If you’re looking to challenge yourself and add a powerful move to your fitness routine, the back bridge is the way to go. It’s not just about flexibility – it requires strength, mobility, and full-body coordination. While it might seem intimidating at first, with the right approach and consistent practice, you’ll be able to nail it.
What Is the Back Bridge?
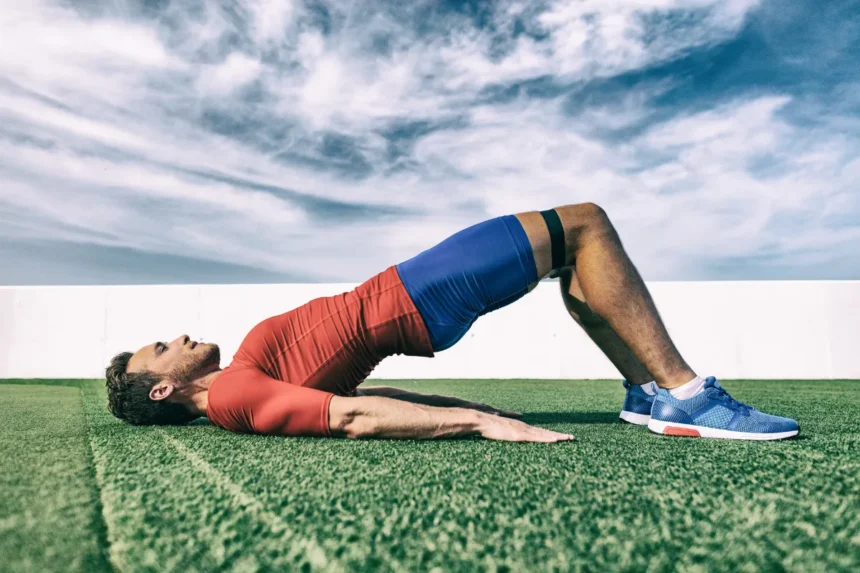
The back bridge is more than just a flashy move—it’s a full-body exercise that demands flexibility and strength all at once. When done properly, it’s an impressive display of both muscle flexibility and control. The movement involves bending your spine backward while supporting your weight on your hands and feet. This exercise engages your wrists, shoulders, spine, hips, and legs, making it an excellent choice for building strength and improving mobility across your whole body.
To perform a solid back bridge, you’ll need to focus on a few key joints and muscles:
- Wrist Flexibility: The wrists bear weight during the movement, so they need to be flexible enough to support you.
- Elbow Position: Full lockout of the elbows is essential to maintain form and balance.
- Shoulder Mobility: The shoulders need to open fully to allow the arms to move overhead.
- Spine Extension: Flexibility in your upper back (thoracic spine) is key to a deep backbend.
- Hip Flexibility: The hips need to extend fully to give you the range of motion required for the back bridge.
Flexibility is crucial, but so is strength. Your posterior chain, which includes your glutes, hamstrings, and back muscles, needs to be strong enough to hold you up in the bridge position.
Wrist Flexibility: The First Step
Let’s talk wrists. If you’ve ever tried the back bridge, you probably noticed that the wrists take a lot of the weight. That’s why wrist flexibility is so important. Ideally, your wrists should be able to extend around 90 degrees, but many beginners struggle with this.
To help with wrist mobility, try elevating your hands on blocks or a cushion. This increases the angle and helps your wrists extend more comfortably, allowing you to focus on other aspects of the bridge without putting too much stress on your wrists. Over time, as your wrists get stronger and more flexible, you can reduce the elevation and work toward a more traditional bridge.
Quick Tip: Before jumping into the back bridge, spend a few minutes doing wrist stretches to get them ready. This will help prevent any discomfort and set you up for success.
Elbow Position: Straight and Strong
Now, let’s move to the elbows. When you’re in the back bridge, your elbows need to be fully extended. If they’re not locked out, your whole posture can suffer, and you won’t have the control you need.
If you’re struggling to fully extend your elbows, it’s okay. Practice with your hands elevated to make the movement easier. The goal is to get your elbows straight and your arms locked out, allowing for a strong, stable position.
Quick Tip: If your elbows feel stiff, try starting with a slightly raised surface to ease into the position. As you get stronger, lower the elevation and work on fully locking out your elbows.
Neck Position: Let It Flow
When it comes to the neck, the key is to let it move naturally with the rest of your body. As your shoulders and spine open up in the back bridge, your neck will start to flex and the head might even poke through. But don’t force it.
It’s completely normal for your neck to move as part of the bridge, but don’t exaggerate the motion. Instead, focus on the rest of your body and let the neck naturally follow the flow of the movement.
Quick Tip: If you’re just starting out, it might feel more comfortable looking down while you’re in the bridge. As your shoulders and spine open more, you’ll find that your neck position will change on its own.
Shoulders: Flexibility Meets Strength
The shoulders are one of the most important parts of the back bridge. Achieving an open shoulder position allows your arms to move overhead, which is crucial for getting a deep backbend. To get your shoulders in the right position, you need to focus on a combination of flexibility, strength, and stability.
Here’s what you need to do:
- Scapular Elevation: Shrug your shoulders toward your ears to increase shoulder flexion.
- Scapular Retraction: Pinch your shoulder blades together to integrate your spine and shoulders for a more open bridge.
- Internal Rotation: Twist your elbows inward to create space within the scapula, allowing your arms to move freely overhead.
These movements help open up the shoulders, making it easier to achieve a deeper backbend. Remember, stretching and strengthening the shoulders are both important. You’ll also want to focus on exercises that target the rotator cuff to improve shoulder stability and strength.
Quick Tip: Practice scapular mobility exercises to improve your shoulder range of motion. Shrug, pinch, and twist your shoulders in these three ways to build strength and flexibility for the back bridge.
Spine Mobility: The Heart of the Back Bridge
The spine is a key player in the back bridge. A stiff spine won’t allow you to get the deep bend needed for a proper back bridge. You need to focus on improving your spinal extension, especially in the thoracic (upper and mid-back) region.
To improve spinal flexibility, try exercises that promote spinal extension, rotation, and lateral flexion. This will help open up your back and give you the flexibility needed for the bridge.
Quick Tip: Focus on strengthening the spinal erectors (the muscles along your back). Stretching your thoracic spine and practicing backbends will help you increase your spinal mobility.
Hip Flexibility: Unlocking the Full Back Bridge
Tight hips can often be the limiting factor in achieving a full back bridge. Specifically, the iliopsoas and rectus femoris muscles (hip flexors) are key contributors to this tightness. To stretch these muscles, focus on hip flexor stretches that involve both knee flexion and hip extension.
A great way to stretch the hip flexors is to perform lunges or other stretches that engage the pelvis and spine. This will help release the tension in your hips, allowing you to extend fully.
Quick Tip: Combine hip flexor stretches with dynamic movements like lunges or leg raises. Hold each stretch for longer periods to gradually improve your flexibility.
Strengthening for the Back Bridge: Building the Posterior Chain
Flexibility is important, but so is strength. The posterior chain, which includes the muscles along your back, glutes, and hamstrings, needs to be strong enough to support the movement. Here are some strength exercises that will help:
- Bridge Push-Ups: These help build strength in the shoulders, arms, and core, all while improving your shoulder flexion.
- Elevated Bridge Holds: Start by practicing with your hands elevated. This reduces the flexibility demands on your lower body while still allowing you to strengthen your shoulders and back.
- Eccentric Training: Focus on slowly lowering your body into the back bridge position. This builds strength in the muscles as they stretch.
Quick Tip: Start by strengthening your back and shoulders with simple push-ups and bridge holds. As you gain strength, increase the intensity and lower the elevation to challenge yourself further.
Putting It All Together: Practice Makes Perfect
Mastering the back bridge isn’t something that happens overnight, but with patience and consistency, you’ll get there. Start by isolating the key areas: wrists, elbows, shoulders, spine, and hips. Work on improving flexibility and strength in each of these areas. Once you’ve made progress, start integrating those movements into the full back bridge. As you practice, remember to focus on form and control rather than rushing the process.
Over time, as you build flexibility, strength, and control, you’ll be able to perform the back bridge with ease.