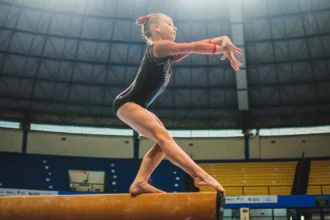
Balance beam is where “basic gymnastics” turns into real body control. At the early levels, the routine is built around a few core jobs: mount safely, show clear shapes (tight body + pointed toes), hit a couple of balances, add one controlled acro element, and finish with a confident dismount.
Below is a clear, level-by-level breakdown of the major beam elements that make up each Level 1–5 routine in the 2021–2029 cycle, based on the official compulsory materials (revised July 2023).
Beam Progression at a Glance (Levels 1–5)
| Level | Time Limit (Warning) | Big Idea of the Level | Dismount Requirement |
|---|---|---|---|
| 1 | 35s (25s) | Simple shapes, balance confidence, first acro exit | Cartwheel to ¾ handstand |
| 2 | 40s (30s) | Cleaner rhythm, controlled movement, first turn | Cartwheel to side handstand |
| 3 | 55s (45s) | Stronger acro shapes, leap amplitude, connected jumps | Cartwheel to side handstand + ¼ turn |
| 4 | 1:05 (55s) | Classic compulsory beam structure | Cartwheel to side handstand + ¼ turn |
| 5 | 1:10 (1:00) | Acro choice, full turn, salto dismount | Stretch jump (punch) + back tuck |
Level 1 Beam Requirements
Time limit: 35 seconds (warning at 25 seconds).
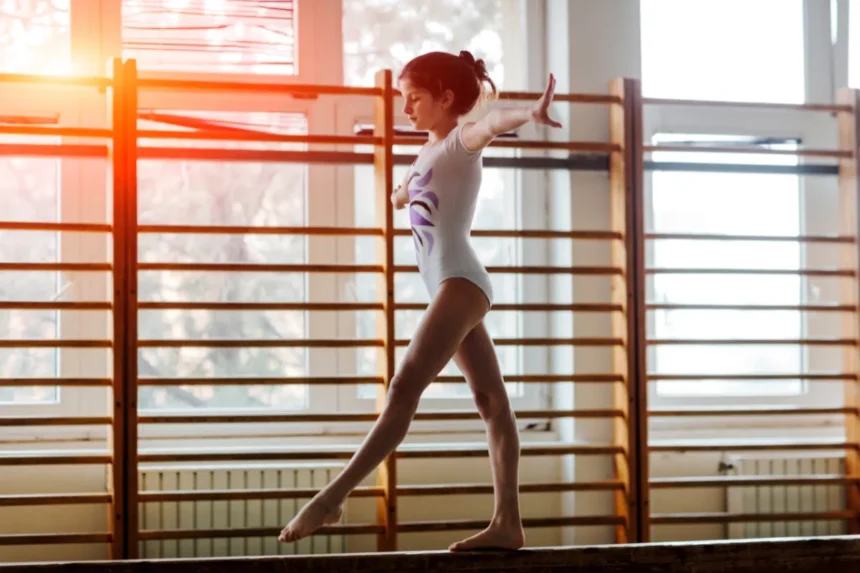
Level 1 beam is all about introducing balance and basic shapes on the beam. Routines are short, simple, and designed to help gymnasts feel confident walking, posing, and moving on a narrow surface. Judges are not looking for difficulty here, they want control, correct positions, and safety.
Required elements (in the routine):
- Jump to front support mount
- Needle leg kick
- Relevé “lock” stand (hold)
- Forward passé balance
- Stretch jump
- Arabesque (30°)
- Forward leg swings
- Cartwheel to ¾ handstand dismount
What judges really want at Level 1:
Smooth continuity without long pauses, straight legs in all supports, and clearly held balance positions. The lock stand, in particular, exists to teach gymnasts how to finish a balance rather than rush through it.
➡️ Recommended Level 1 Beam Routine
Level 2 Beam Requirements
Time limit: 40 seconds (warning at 30 seconds).
Level 2 beam builds directly on Level 1, adding cleaner turns, clearer rhythm, and more control through transitions. The routine is still compulsory and short, but judges expect gymnasts to look more confident moving from skill to skill instead of pausing to “reset” their balance.
Required elements (in the routine):
- Jump to front support mount
- Single leg kick up to stand
- Forward passé balance
- Stretch jump
- Arabesque (30°)
- Forward leg swing + backward leg swing
- ½ (180°) pivot turn
- Cartwheel to side handstand dismount
Level 2 coaching focus:
Helping the gymnast move forward and backward with purpose. Leg swings teach weight transfer and body awareness without adding risk, while the pivot turn introduces spotting, posture, and rotational control.
➡️ Recommended Level 2 Beam Routine
Level 3 Beam Requirements
Time limit: 55 seconds (warning at 45 seconds).
Level 3 is where beam starts to feel noticeably more demanding. The routine is still compulsory, but it introduces bigger acro shapes, stronger leap positions, and more turning control. Judges now expect gymnasts to show confidence moving forward, backward, and sideways on the beam without rushing.
Required elements (in the routine):
- Front support fish pose mount
- Cross handstand
- ½ turn in forward passé (heel-snap turn technique)
- Two stretch jumps
- Arabesque (45°)
- Straight leg leap (90°)
- Two ½ (180°) pivot turns
- Cartwheel to side handstand + ¼ (90°) turn dismount
Level 3 also serves as a bridge level in the program. While Levels 1–3 are developmental, many gyms use Level 3 to prepare gymnasts for the competitive compulsory routines introduced at Levels 4 and 5.
➡️ Recommended Level 3 Beam Routine
Level 4 Beam Requirements
Time limit: 1:05 (warning at 55 seconds).
Level 4 is the first widely competed compulsory beam routine in many areas. It’s built around the classic formula: mount → acro → jump → handstand → balance → leap → dismount.
Required elements (in the routine):
- Front support fish pose mount
- Cartwheel
- ½ turn in forward passé
- Stretch jump → split jump connection
- Split jump (120°)
- Cross handstand
- Scale (horizontal)
- Straight leg leap (120°)
- Cartwheel to side handstand + ¼ (90°) turn dismount
What makes Level 4 score well:
Hitting split and leap angles, showing a true one-second handstand, and finishing the dismount turn cleanly. The dismount turn is a very common place for avoidable deductions.
➡️ Recommended Level 4 Beam Routine
Level 5 Beam Requirements
Time limit: 1:10 (warning at 1:00).
Level 5 is a major jump because it introduces an acro choice (one of several allowed options), requires a full turn, and finishes with a salto dismount.
Required elements (in the routine):
- Front support fish pose mount
- One acro option (choose one listed):
- Back walkover (150°) or backward roll to minimum of ¾ handstand or flic-flac (back handspring) step-out or flic-flac to two feet or front walkover (150°)
- 1/1 (360°) turn in forward passé
- Split jump (150°) + sissonne
- Scale (above horizontal)
- Straight leg leap (150°) → stretch jump
- Cartwheel
- Stretch jump (punch)
- Backward salto tucked (back tuck) dismount
Level 5 scoring reality:
This is the level where small details matter most. Split angles, heel position during turns, and how confident and continuous the acro skill looks can be the difference between an average routine and a strong score.
➡️ Recommended Level 5 Beam Routine
Common Questions Parents Ask About Beam (Levels 1–5)
Do Levels 1–3 have to compete?
Not always. Levels 1–3 are developmental. Many gyms use them for in-house meets or training only, and advancement is typically based on coach evaluation rather than required scores.
Why does beam seem so strict about posture and pauses?
Beam rewards intentional control. Judges want gymnasts to show balance, not rush through skills to avoid falling. Long pauses or visible hesitation lead to rhythm deductions as levels increase.
What happens if my child falls?
Falls are expected, especially early on. The gymnast may remount and continue. Coaches care more about how calmly and safely the gymnast resumes the routine than the fall itself.
Why are split and leap angles such a big deal?
Split and leap angles teach flexibility, alignment, and future dance requirements. At Levels 4 and 5, missing angles can add up to significant deductions even if the gymnast stays on the beam.
Why does beam feel harder than other events?
Beam combines balance, fear management, flexibility, strength, and focus—on a 4-inch surface. Progress is often slower and less linear than on vault or floor, and that’s normal.
Why does Level 5 feel like such a big jump?
Because it is. Level 5 adds:
- Larger acro skills
- A full turn
- Bigger split requirements
- A salto dismount
Many gymnasts spend more time at Level 5 than earlier levels, and that’s completely normal.