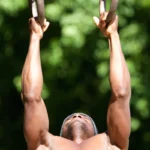
The Iron Cross is one of the most iconic moves in gymnastics and calisthenics. Holding your body with arms extended straight out to the sides on rings demands not only raw strength but also tendon resilience, shoulder stability, and flawless technique.
Understand the Technical Demands
The Iron Cross is all about strict form. Here’s what to keep in mind:
- Straight Arms: No bending at all. Your elbows must be locked out fully. Even hyperextended elbows must be locked.
- Shoulder Depression: Actively press your shoulders down. This not only makes the skill stronger but also cleaner in appearance. Avoid letting your head sink.
- Head Position: Keep your head neutral. Looking down lifts your shoulders and breaks the line.
- Scapular Positioning:
- Protracted (rounded forward): Mostly chest and front delts. Stronger, but less aesthetic.
- Retracted (squeezed back): Rare, extremely difficult, loads the back.
- Neutral: Balanced 50/50 front/back chain. This is generally the best position to aim for.
👉 Small variations are okay depending on your natural strengths, but arms must stay locked and shoulders depressed.
For adults, training the Iron Cross requires patience.You need a structured plan that blends skill work, strength training, and accessory conditioning.
Step 1: Build the Prerequisites
If you’re just starting out, don’t rush into Iron Cross training. First, build a rock-solid base of pressing and pulling strength.
- Pulling Basics → Develop pull-ups, chin-ups, and eventually weighted pull-ups.
- Pressing Basics → Train dips and weighted dips. Ring dips are especially important since they mimic the instability of the cross.
- Ring Support Hold → Aim for 5×30-second holds with control. For bonus stability, practice swinging support holds.
If you can’t yet hit these standards, stick with them until they’re solid. Without this foundation, the Iron Cross will be unsafe and nearly impossible.
Step 2: Assisted Skill Work
Before you attempt a full Iron Cross, you need a safe way to introduce your body to the position. Resistance bands are the perfect tool for this. They give you support, reduce the strain on your tendons and ligaments, and let you practice the mechanics without the overwhelming load of your full bodyweight.
Banded Cross Presses
Setup:
Anchor resistance bands beneath the rings so they provide upward assistance. The thicker the band, the more support you’ll get. Make sure the rings are stable and set to a comfortable height where you can easily mount into a support hold.
Execution:
Begin in a solid support position with your arms locked and shoulders pressed down. From here, slowly lower your arms outward into the Iron Cross position. Pause briefly at your lowest controlled point, then press the rings back toward your sides to return to support. Keep the movement smooth and deliberate—don’t let the bands snap you up or pull you down.
Focus Points:
- Keep your elbows fully locked at all times—any bend takes away from the integrity of the drill.
- Maintain shoulder depression (pushed down, not shrugged).
- Engage a hollow body position by tucking your pelvis under and bracing your core.
- Stay in control. The bands are there to assist, not to take over.
Prescription:
Perform 4–6 sets of 3–5 reps, focusing on clean execution rather than volume. Rest long enough between sets to maintain form.
Step 3: Mini Crosses and Holds
After building confidence with bands, the next step is to test your strength directly on the rings using partial lowers. Think of these as “mini Iron Crosses” where you control how far you descend.
How to Perform Mini Crosses
Setup:
Start in a strong support hold on the rings—shoulders pressed down, elbows locked, and core tight in a hollow body.
Execution:
- From the support, begin lowering your arms outward into the cross.
- Stop as soon as you reach the limit where your form begins to falter. That means:
- No bent arms. Your elbows must stay locked.
- No shrugged shoulders. Keep them depressed and stable.
- No arching. Stay in a hollow body position.
- Once you reach that controlled range, hold the position isometrically for a few seconds before pressing back into support.
Prescription:
3–5 sets of 3–6 second holds. Rest generously between sets to preserve clean technique.
Why It Matters:
Mini crosses aren’t about going as low as possible. They’re about conditioning tendons and ligaments, which adapt much more slowly than muscles. This step is where you lay the groundwork for long-term joint resilience.
Step 4: Strength Builders
Skill-specific work is essential, but you’ll also need to build raw pushing strength to support the Iron Cross. Strong chest, shoulders, and triceps will provide the muscle base to match your tendon conditioning.
Bulgarian Dips (Advanced Option)
This is one of the closest drills to the Iron Cross because it mimics the joint angles.
How to Perform:
- Begin in a stable support hold on rings.
- Slowly lower while internally rotating your shoulders so palms turn slightly outward.
- Descend until elbows are about 90°.
- Press back up with control.
Key Points:
- Focus on chest engagement, not just arms.
- Move slowly to protect the biceps tendon.
- Keep core tension to avoid collapsing forward.
Prescription: 3–5 sets of 3–5 reps.
⚠️ Caution: Bulgarian dips place heavy load on the upper biceps tendon, already taxed in Iron Cross work. Attempt only if your shoulders are mobile and healthy. Skip if you feel sharp tendon pain.your journey.
Dips (General Strength Builder)
For most adults, regular dips are the safer, more sustainable option. They develop overall pushing strength without excessive tendon stress.
Variations:
- Ring Dips: Adds instability for stabilizer strength.
- Parallel Bar Dips: Stable base, easier to add weight.
- Weighted Dips: Progress beyond bodyweight with a dip belt or dumbbell.
Prescription: 3–4 sets of 6–10 reps with controlled tempo and full range.
Why It Matters:
Bulgarian dips build position-specific strength, while regular dips provide a broader foundation. Together, they prepare your muscles to support tendon demands.
Step 5: Accessory Work
Accessories target weak links and condition supportive muscles without overloading tendons.
Bicep Curls
- 10–20 reps, 2–3 sets.
- Builds muscular endurance without directly straining the tendon.
Straight-Arm Dumbbell Presses (Warm-Up / Conditioning)
- Setup: Lie in a hollow-body “dish” with light dumbbells at your sides.
- Execution: With elbows locked and shoulders depressed, press weights upward above the hips, then lower with control.
- Prescription: 2–3 sets of 10 reps.
- Purpose: Reinforces the straight-arm mechanics of the Iron Cross.
Programming the Iron Cross
A balanced training session might look like this:
- Straight-Arm Warm-Up → Light dumbbell presses, 2–3 sets.
- Skill Work → Banded presses, partial lowers, or mini crosses at 6–7/10 effort.
- Strength Training → Bulgarian dips or weighted dips, 3–5 sets of 3–5 reps.
- Accessories → Bicep curls or other isolation, 2–3 sets in higher rep range.
⚠️ Key Tip: Never train the Iron Cross at max effort when starting out. Tendons adapt slowly, and pushing too hard too soon is the fastest way to tendonitis. Technique and consistency always come before brute force.
Iron Cross Training FAQ: Common Mistakes (and Fixes)
Q: Why can’t I hold the Iron Cross yet, even though I’m strong?
A: Most adults rush in too early. Tendons and ligaments adapt slower than muscles. Focus first on support holds, banded progressions, and partial lowers.
Q: My elbows bend when I try the hold. Is that okay?
A: No. Even a slight bend disqualifies the attempt and stresses the biceps tendon. Scale back to bands or partial holds until you can stay locked.
Q: My shoulders rise toward my ears. What’s wrong?
A: That’s shoulder shrugging. Actively push shoulders down. Strengthen your lats and lower traps to support better depression.
Q: Should I round my chest and shoulders forward?
A: Some protraction is natural, but avoid collapsing. Aim for shoulders depressed and a neutral-to-slightly protracted chest.
Q: Can I train the Iron Cross to failure?
A: No. Pushing past form breakdown overloads tendons. Stop each set before technique slips. Slow and steady wins.
Q: Why do my elbows and biceps hurt afterward?
A: Likely tendon stress. Muscles can outpace tendons. Add isometrics, high-rep curls, and extra rest to support tendon adaptation.
Q: How important is core tension?
A: Essential. If you lose the hollow body (hips sag, ribs flare), the load shifts dangerously to the shoulders and elbows. Keep your pelvis tucked, abs braced, and glutes squeezed.