Ring Workout: 5 Gym Ring Exercises, Beginner to Advanced
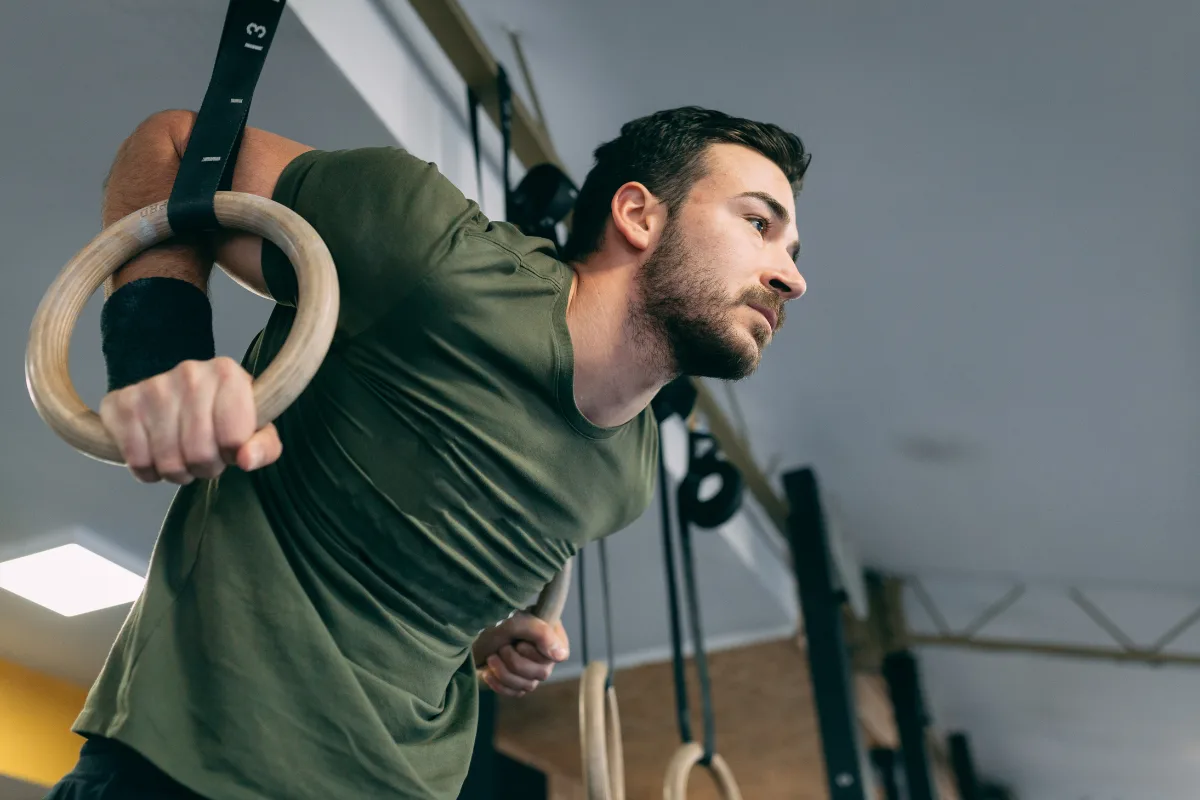
A ring workout is a strength session on gymnastic rings. A simple, complete one uses five exercises: ring push-ups, ring rows, ring dips (or a support hold), ring pull-ups and ring-assisted leg exercises, which together cover pushing, pulling, support and the legs.
Contents
Beginners can start with two or three short sessions a week, a few sets of each exercise and the easiest version they can do with good form. Changing the ring height, your body angle or the help from your feet makes any exercise easier or harder. Because each ring moves on its own, every exercise also asks you to steady the rings, the control gymnasts rely on in rings support and holds.
Quick Guide: The 5 Essential Gym Ring Exercises
| Exercise | Main Muscles | Beginner Version | Advanced Progression |
|---|---|---|---|
| Ring Push-Up | Chest, shoulders, triceps, core | Incline ring push-up | Archer or one-arm ring push-up |
| Ring Row | Back, biceps, rear shoulders, core | Upright ring row | Archer or one-arm ring row |
| Ring Dip | Chest, triceps, shoulders | Foot-assisted or band-assisted dip | Weighted ring dip |
| Ring Pull-Up | Lats, upper back, biceps, forearms | Band-assisted pull-up | Weighted or one-arm progression |
| Ring-Assisted Legs | Quads, glutes, hamstrings | Assisted squat and hamstring curl | Pistol squat and single-leg curl |
These aren’t the only exercises you can do on rings. Gymnastics skills such as skin the cat, the front lever and the muscle-up come later; these five are the foundation they build on.
How to Plan a Ring Workout
Start with what the session is for. A gymnast may need pulling strength for bars or support strength for rings; a beginner may simply be learning how the rings move. Pick three to five exercises that serve that goal rather than every exercise the rings allow, and use the floor or a stable bar where that suits the task better.
| Part | Example | What to watch |
|---|---|---|
| Warm-up | 5–10 minutes of general movement, then a few easy reps of the first exercise | Check the straps, buckles and anchor first |
| Pull | Ring rows or assisted ring pull-ups | The same body line on every rep |
| Push or support | Ring push-ups or a support hold with the feet helping | Rings close to the body, shoulders not sinking |
| Body control | A hollow hold on the floor | Lower back down, legs together |
| Legs (optional) | Ring-assisted squats or hamstring curls | The rings help with balance, not lifting |
| Finish | Note the exercises, settings and good reps | Any pain or unusual tiredness |
Choose the Version Before the Number
Eight nearly upright rows and eight rows with the body almost horizontal are different workouts, so pick a version you can repeat with good form before setting a target. Youth guidelines from the National Strength and Conditioning Association (NSCA) suggest one to three sets of 6 to 15 repetitions for strength exercises, starting with light loads and good technique. Count holds in seconds, and only while the position stays steady.
Do new or demanding exercises early in the session, while you’re fresh; the NSCA gives the same advice for young athletes learning a skill. A first dip or lever attempt doesn’t belong at the end of a tiring circuit.
Rest, Recovery and Pain
Rest long enough between sets to repeat the same quality. For young athletes doing moderate strength work, the NSCA says about a minute may be enough, with longer rests for efforts that need more power or skill. It also recommends starting with two or three sessions a week on non-consecutive days.
Count the work you already do. Bars and rings practice already loads the hands, arms and shoulders, so a gymnast’s extra ring sessions should fit the conditioning plan and be agreed with the coach. Stop any exercise that hurts: the American Academy of Pediatrics (AAP) tells young athletes to stop strength training at once if they feel pain, and to have signs of injury or overuse checked before training again.
1. Ring Push-Ups
The ring push-up is one of the best exercises for learning how to stabilize the rings.
It works like a normal push-up, but instead of placing the hands on the floor, the athlete supports the body on two independently moving rings.
Because the rings can be adjusted higher or lower, the exercise can be made easy enough for a beginner or difficult enough for an advanced athlete.
Muscles worked: Chest, front shoulders, triceps, serratus anterior, core stabilizers.
How to Do a Ring Push-Up
- Set the rings approximately waist height for an easier version.
- Hold one ring in each hand and walk the feet backward until the body forms a straight line from the shoulders through the hips to the feet.
- Keep the core tight.
- Slowly bend the elbows and lower the chest between the rings.
- Press through the rings until the arms are straight again.
- Try to keep the rings controlled rather than allowing them to swing outward.
Beginner Ring Push-Up
The easiest way to scale the exercise is to increase the height of the rings. The more upright the body remains, the less body weight must be pressed. A beginner can therefore start with something closer to a standing incline push-up.
As strength improves, gradually lower the rings or move the feet farther away so the body becomes more horizontal.
Intermediate Progressions
Once standard ring push-ups become comfortable, several variations can increase the challenge:
- Lower the rings closer to the floor
- Elevate the feet
- Pause at the bottom
- Perform deeper push-ups
- Turn the rings slightly outward at the top
- Begin shifting more weight toward one arm
The rings can allow the chest to travel below hand level, but additional depth should only be used if the shoulders remain comfortable and controlled.
Advanced Progressions
One progression is the archer ring push-up. As the body lowers, most of the weight shifts toward one arm while the opposite arm moves farther to the side.
Over time, assistance from the second arm can gradually be reduced until the athlete begins working toward a one-arm ring push-up.
Another route is toward overhead pressing:
Ring push-up → pike push-up → feet-elevated pike push-up → assisted ring handstand push-up
These variations require considerably more shoulder strength and should be treated as long-term progressions rather than necessary beginner exercises.
2. Ring Rows
If ring push-ups provide the horizontal pushing movement, ring rows provide the horizontal pull. They are also one of the most beginner-friendly ring exercises because the difficulty can be changed simply by moving the feet.
Muscles worked: Latissimus dorsi, rhomboids, trapezius, rear deltoids, biceps, forearms, core.
How to Do a Ring Row
- Set the rings around waist height.
- Hold the rings and lean backward with the arms straight.
- Keep the hips extended so the shoulders, hips and knees remain roughly in one line.
- Pull the chest toward the rings by driving the elbows backward.
- Pause briefly at the top.
- Slowly lower until the arms are straight again.
- Avoid allowing the hips to sag or using momentum to throw the body upward.
Beginner Ring Row
Beginners should start fairly upright. Moving the feet farther from the anchor point reduces the percentage of body weight being pulled.
The athlete can therefore practice the full rowing movement without needing enough strength for a horizontal bodyweight row.
How to Make Ring Rows Harder
Gradually move the feet closer toward the point directly underneath the rings. As the body becomes more horizontal, more body weight must be lifted.
A basic progression might look like this:
Upright row → inclined row → horizontal row → feet-elevated row
Record the setup rather than counting steps back from the anchor, since step length varies from person to person. Note the ring height, where your feet are and your body angle, then change only one of them at a time.
Advanced Ring Row Progressions
After horizontal rows become easy, unilateral variations can be introduced. A useful progression is:
Side-to-side row → archer row → assisted one-arm row → one-arm ring row
During one-arm rows, the torso should remain as square as possible rather than twisting toward the working arm.
Ring rows are also useful preparation for pull-ups because they work many of the same back and arm muscles.
3. Ring Dips
Ring dips are where ring training becomes noticeably more demanding. Someone who can perform several dips on parallel bars may still find the rings difficult because the hands are no longer supported by a fixed surface.
Before worrying about repetitions, beginners should learn to control a basic ring support position.
Muscles worked: Chest, triceps, front shoulders, serratus anterior, core stabilizers.
Start With the Ring Support Hold
- Set the rings around hip height.
- Push down into the rings until the arms are straight and the feet are off the floor. Beginners can keep their feet lightly on the floor at first.
- Keep the rings close to the sides of the body.
- Hold the position without allowing the rings to swing excessively.
A strong, stable support makes the actual dip much easier to learn.
How to Do a Ring Dip
- Begin in the top support position.
- Slowly bend the elbows and lower the body.
- Keep the rings relatively close to the torso.
- Descend only as far as can be controlled comfortably.
- Press downward into the rings and return to the support position.
Beginners do not need to force an extremely deep dip. The bottom of the movement places the shoulder into a demanding position, so range should be built gradually.
Beginner Ring Dip Progressions
A full bodyweight ring dip is often too difficult at first.
Instead, use:
Ring support hold → foot-assisted dip → band-assisted dip → negative dip → full ring dip
For foot-assisted dips, keep the feet lightly on the floor or a box and use the legs only as much as necessary.
Resistance bands can also reduce the amount of body weight being pressed.
Advanced Ring Dip Progressions
Once controlled ring dips become comfortable, difficulty can be increased with:
- Paused ring dips
- Slow eccentric dips
- Weighted ring dips
- Wider ring dips
- Ring turnout support work
There is no need to rush into extreme variations. A clean set of controlled standard ring dips provides plenty of strength stimulus.
4. Ring Pull-Ups
Ring pull-ups provide the main vertical pulling movement.
Unlike a fixed pull-up bar, rings can rotate while the athlete pulls. This allows the hands and forearms to find a comfortable position rather than being locked into one grip. Some people find that easier on the wrists and elbows, but it doesn’t guarantee protection from joint problems. Research has also found similar activity in the main pulling muscles on moving handles and on a bar; our comparison of rings and a pull-up bar has the details.
A common technique is to begin with the palms facing forward or toward each other and allow the rings to rotate naturally during the pull.
Muscles worked: Latissimus dorsi, biceps, brachialis, upper back, forearms, rear shoulders, core.
How to Do a Ring Pull-Up
- Hang from the rings with straight arms.
- Keep the body controlled rather than swinging.
- Pull the shoulders down and begin driving the elbows toward the ribs.
- Continue pulling until the chin rises above the hands or the rings reach approximately chest or shoulder level.
- Lower slowly back to a full controlled hang.
Beginner Ring Pull-Up Progressions
Someone who cannot perform a pull-up yet can start with:
Ring rows → foot-assisted pull-ups → band-assisted pull-ups → negative pull-ups → full ring pull-ups
For negative pull-ups, begin at the top of the pull-up and lower slowly. Lowering-only work is demanding, so add it gradually.
Resistance bands are another useful option. Thicker bands provide more assistance, while thinner bands move the athlete closer to lifting full body weight.
Rows or Assisted Pull-Ups?
A ring row and a pull-up overlap but are different tasks. In a row, the body leans back with the feet on the floor and moves toward the rings; in a pull-up, the whole body hangs below the hands and rises. While a full pull-up is out of reach, the row is often the right choice, not a lesser one.
When the feet or a band help with a pull-up, keep that help consistent and note it: a set in which the feet push harder as you tire can’t be compared with an earlier one. End the set when the movement changes, such as a kick or a shorter range, rather than swinging to reach a number. Gymnasts swing on purpose in skills, but a strict strength set is a different task. Our guide to weight training for gymnasts compares chin-up and pull-up grips.
Intermediate Pull-Up Progressions
Once several clean repetitions are possible, try:
- Paused pull-ups
- Chest-to-ring pull-ups
- Slow eccentric pull-ups
- L-sit pull-ups
- Weighted pull-ups
These variations increase difficulty without immediately requiring a completely new movement.
Advanced Pull-Up Progressions
Advanced athletes may eventually work toward one-arm pulling. A gradual progression could include:
Two-arm pull-up → uneven pull-up → finger-assisted one-arm pull-up → band-assisted one-arm pull-up → one-arm pull-up
One-arm work places much greater stress on the elbows, shoulders and grip, so the progression should be slow. One-arm pulling, long lowering-only sets and added weight are optional loading choices, not milestones every athlete has to reach.
Ring pull-ups and ring dips are also the two halves of the ring muscle-up, a pull into a dip that starts from a false grip.
5. Ring Leg Exercises
Rings are usually associated with upper-body training, but they can also make lower-body exercises much easier to scale. Instead of using the rings as resistance, beginners can use them for balance and assistance.
Two movements work especially well:
- Ring-assisted squats and pistol squats
- Ring hamstring curls
Together, they train both the front and back of the legs.
A. Ring-Assisted Squat
Muscles worked: Quadriceps, glutes, adductors, hamstrings, calves, core.
- Hold the rings lightly and stand with the feet in a comfortable squat stance.
- Sit the hips downward while bending the knees.
- Use the rings only as much as necessary for balance.
- Drive through the feet to stand.
- As strength improves, gradually use less arm assistance.
The rings are especially useful for people learning squat depth because they provide something stable to hold while practicing the movement.
Progress Toward the Pistol Squat
The same setup works well for single-leg training.
A simple progression is:
Assisted squat → assisted split squat → assisted single-leg squat → ring-assisted pistol squat → unassisted pistol squat → weighted pistol squat
During a ring-assisted pistol squat, one leg stays extended forward while the athlete lowers on the opposite leg.
Holding the rings reduces the balance and strength requirement, making it possible to practice the movement gradually.
B. Ring Hamstring Curl
Squats and pistol squats emphasize the quadriceps and glutes, so adding a hamstring exercise makes the lower-body portion more complete.
- Set the rings close to the floor.
- Lie on the back and place one heel inside each ring.
- Raise the hips.
- From the straight-leg position, bend the knees and pull the heels toward the glutes.
- Slowly extend the legs again while keeping the hips elevated.
Muscles worked: Hamstrings, glutes, calves, core.
Making Hamstring Curls Harder
Begin with a comfortable body position and gradually increase the leverage.
Progressions include:
Two-leg curl → slower curl → extended-leverage curl → assisted single-leg curl → single-leg ring hamstring curl
Beginner-to-Advanced Ring Exercise Progression
The five exercises can grow with the athlete for years.
| Movement | Beginner | Intermediate | Advanced |
| Ring Push-Up | High incline | Standard ring push-up | Archer/one-arm variation |
| Ring Row | Upright row | Horizontal row | One-arm row |
| Ring Dip | Foot-assisted | Full ring dip | Weighted ring dip |
| Ring Pull-Up | Band-assisted | Full pull-up | Weighted/one-arm progression |
| Ring Legs | Assisted squat | Assisted pistol + hamstring curl | Pistol + single-leg curl |
Progress when the current version can be performed through a controlled range of motion without swinging, collapsing or losing position.
Keep a short log of each exercise: ring height, foot position, any assistance and the number of good repetitions. Change one thing at a time, such as a slightly lower ring or one more repetition, so you can tell what made the difference. The NSCA recommends individual workout logs for young athletes to monitor progress.
Train over a mat, on rings hung from an anchor approved for them. Our beginner’s guide to gymnastic rings has the full setup checklist and the first exercises to learn.
Final Takeaway
A good ring workout uses five basic exercises (a push-up, a row, a dip or support hold, a pull-up and a leg exercise), each at a version you can do with good form. Two or three sessions a week with a few sets of each is a sound start.
Make exercises harder one step at a time by changing the ring height, body angle or assistance, keep a simple log and stop any exercise that hurts. Skills such as skin the cat and levers build on these basics and are best learned with a coach.
Main Sources
- Faigenbaum et al. (2009), Youth resistance training: updated position statement paper from the National Strength and Conditioning Association, Journal of Strength and Conditioning Research
- American Academy of Pediatrics (HealthyChildren.org): Strength Training
- American Academy of Pediatrics (HealthyChildren.org): Guidance on Resistance Training for Children (2020 clinical report)
- Walker et al. (2023), Comparison of muscle activity during a ring muscle up and a bar muscle up, International Journal of Exercise Science