Gymnastic rings are one of the most powerful tools for building full-body strength, mobility, and control.
Unlike pull-up bars or dip stations, rings never stay still. They swing, shake, and wobble, forcing your body to recruit stabilizer muscles you may have never felt before. If you’ve ever wanted to unlock classic strength moves like muscle-ups, front levers, or back levers, the journey begins here with the rings.
Step 1: Master the False Grip
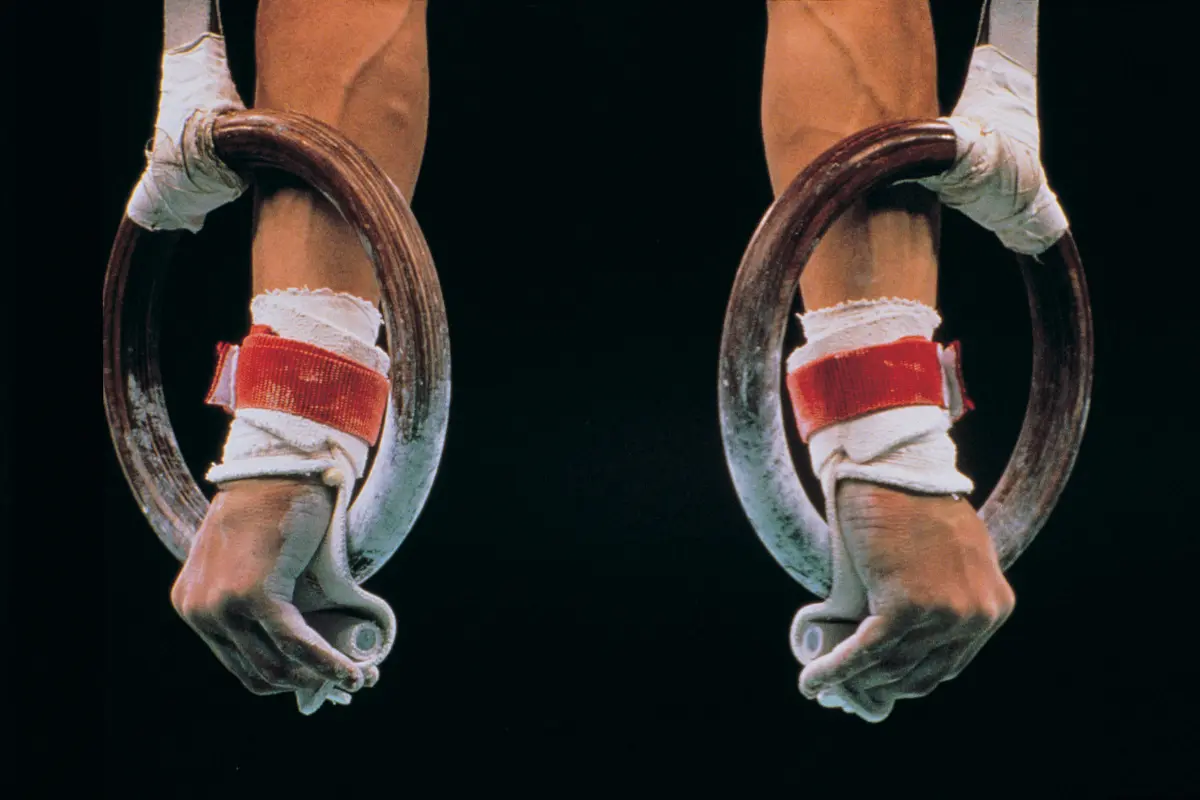
The very first lesson on the rings is grip, and it’s very different from a regular pull-up bar.
On a bar, most people use a normal grip: thumbs wrapped over or under. On rings, that doesn’t work. To get above the rings for a muscle-up or advanced hold, your wrists must already be positioned on top of the rings.
This is called the false grip.
Instead of wrapping your palm around, you hook the ring so it rests across the base of your palm and wrist. Your wrist bends forward, creating a strongb but unusual pressure point in the joint.
It feels awkward at first, but without the false grip you won’t be able to transition smoothly from a pull-up into a dip or muscle-up on the rings.
Drill: Practice hanging from the rings in a false grip for up to one minute. Break it down into short sets (e.g., 6 × 10 seconds) until you can accumulate a full minute. This toughens your wrists and teaches you how to support your body in the correct position.
Step 2: The Hollow-Body Support Hold
Once you’re comfortable hanging, the next milestone is the support hold—the locked-out position at the top of the rings, similar to finishing a dip.
- Adjust the rings to about shoulder height.
- Step between them and jump up into the support position.
- Keep your arms straight and elbows locked.
- Turn your palms slightly outward so the rings don’t cave inward.
- Engage your body in a hollow position: chest lifted, core braced, glutes and legs squeezed tightly together.
This looks simple, but the instability makes it incredibly demanding. Most beginners shake and wobble the first time they try it. With time, however, this hold builds the stability foundation you’ll need for dips, levers, and presses.
Drill: Accumulate one minute in a support hold. Break it into smaller sets of 5–15 seconds if needed.
Step 3: Skin the Cat – Opening the Shoulders
The next step is learning skin the cat, a fundamental drill that improves shoulder mobility and introduces the pathway toward front and back levers.
How to do it:
- Start in a dead hang with straight arms.
- Tuck your knees and slowly pull your legs up and over.
- Roll through until your hips pass between your arms and you’re upside down.
- Pause in a tucked back lever position, then reverse the motion to return.
Beginners can start with partial reps, just lifting the legs to vertical and back. Over time, work toward the full rotation. Keep your arms straight the whole time. Sets of 3–5 reps will quickly build strength, mobility, and confidence.
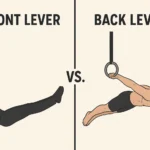
Step 4: Tucked Levers (Front & Back)
With skin the cat under control, you’re ready to try static holds: the tuck front lever and tuck back lever. Both build massive pulling strength and body control.
- Tuck Front Lever: From a hang, pull your knees to your chest and lean back until your torso is parallel to the ground. Arms stay straight, lats fully engaged.
- Tuck Back Lever: From skin the cat, stop in the horizontal tuck position with your chest facing the ground. Hold without bending your arms.
The key here is time under tension. Try to accumulate one full minute of total hold time each session (for example, 10 × 6-second holds). As you get stronger, gradually extend your legs to progress toward harder variations.
Step 5: Progress Toward Full Levers
Once you’re solid in the tuck, it’s time to open your body:
- Advanced Tuck: Knees bent but hips extended.
- One-Leg Lever: Extend one leg while keeping the other tucked.
- Straddle Lever: Spread both legs wide to reduce leverage.
- Full Lever: Legs straight together, body locked in a horizontal line.
Each variation increases difficulty. Progress slowly, adding just a few seconds each week. Full levers are far harder on rings than on bars due to the added instability. But if you can do them on rings, your strength will carry over everywhere.
Why Rings Are Harder Than Bars
Rings look similar to bars, but they feel completely different. Here’s why:
1. Instability Engages More Muscles
Bars are fixed. Rings swing in every direction, forcing your body to constantly make micro-adjustments. That instability recruits small stabilizer muscles in your shoulders, chest, arms, and core. Beginners wobble not from weakness, but from lack of neuromuscular coordination.
2. Full Range of Motion
Bars lock your hands in place. Rings let your arms rotate outward or inward, giving you more freedom and deeper ranges:
- Dips and push-ups stretch your chest further.
- Pull-ups rotate naturally into joint-friendly positions.
- Levers and muscle-ups flow more cleanly.
The downside? Extra range demands extra control.
3. No Resting Points
On a bar, you can lean or rest slightly. On rings, there’s no break—if you relax, the rings drift away. Every rep requires constant tension, making even basic dips or push-ups exhausting.
4. Straight-Arm Strength
Advanced ring skills (front lever, back lever, iron cross, planche) demand straight-arm strength. Bars rarely train this. Rings condition your tendons and connective tissues for heavy straight-arm loads, creating extreme joint stability.
5. Transfer of Strength
Ring strength often transfers to bar work, but not always the other way around. Athletes strong on rings usually dominate bar training. Bar athletes, on the other hand, often struggle when they first try rings.
The Bottom Line
Start with the basics: false grip, support holds, and skin the cat. Build into tuck levers, then progress step by step toward full levers. With patience, you’ll unlock strength most people never reach, because the rings leave no shortcuts.