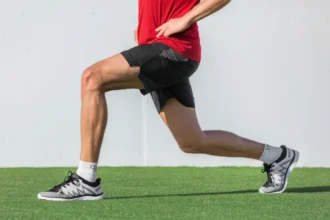
The wrist is a highly mobile joint with a delicate balance of strength and flexibility. Unlike the shoulder or hip, it isn’t naturally designed to bear bodyweight. Yet in gymnastics, wrists are essentially a second pair of feet—supporting the entire body in handstands, vaults, bar swings, and tumbling skills.
Without targeted conditioning, wrists are vulnerable to:
- Overuse injuries (tendinitis, stress fractures, ligament sprains)
- Acute pain from impact landings or awkward angles
- Loss of performance due to limited range of motion
Gymnasts solve this by combining mobility drills, strengthening exercises, and smart progression. Their approach can help anyone like athletes, yogis, or desk workers to develop healthier wrists.
Here are the top four exercises to help stabilize and strengthen your wrists:
1. Palm Poses
Palm poses are one of the most fundamental wrist-strengthening exercises. They target the flexor muscles of the forearm, which are crucial for bearing weight in handstands, push-ups, planche progressions, and other floor-based movements.
How to Perform Palm Poses
- Positioning: Begin in a kneeling position with your palms flat on the ground, fingers pointing forward, and elbows locked.
- Execution: Press your palms into the ground, lifting the heels of your hands while keeping your fingers and thumb in contact with the floor. This simulates the wrist flexion needed to stabilize during handstands and similar skills.
Progressions
- Wall Support – Practice against a wall to get used to the motion with minimal load.
- Kneeling Support – Shift onto the floor in a kneeling position, adding more bodyweight.
- Kneeling Push-Up Position – Place more load on your hands by moving into a kneeling push-up stance.
- Full Push-Up Position – Maximize wrist loading, mimicking advanced gymnastics pressure.
Tips for Success
- Start with 10–15 reps, working up to 3–5 sets.
- Increase intensity gradually by transferring more weight from legs to hands.
- Never rush progressions—control and good form always come first.
2. Finger Poses
Finger poses add an extra layer of challenge by targeting the forearm flexors with longer leverage. This movement strengthens the fingers and prepares them for floor-based stability in handstands and push-ups.
How to Perform Finger Poses
- Position: Begin kneeling with shoulders over your hands and elbows locked.
- Finger Placement: Extend fingers forward. Lift your index, middle, and ring fingers off the ground, while keeping the thumb and pinky planted.
- Variation: If full elevation feels unstable, allow a slight forward bend for added safety.
Progressions
- Wall Support – Practice finger lifting against a wall to build comfort.
- Kneeling Support – Transition to the floor, keeping shoulders stacked.
- Inhaling Push-Up Position – Add intensity by moving toward a push-up stance.
- Full Push-Up Position – For advanced trainees, attempt push-ups while holding finger elevation (optional and high risk).
Training Guidelines
- Perform 10–15 reps per set as part of your warm-up.
- Stick with lower progressions until your control and finger strength improve.
3. Front-Back of the Hand (Wrist Extensor Work)
While the first two exercises target wrist flexion, it’s equally important to train the wrist extensors. The “front-back of the hand” exercise strengthens these opposing muscles, promoting balance and reducing injury risk.
How to Perform the Front-Back of the Hand
- Start Simple: Place the backs of your hands against a wall to explore the position.
- Kneeling Position: Transition to kneeling on the floor, increasing the load slightly.
- Kneeling Push-Ups: Add push-ups from a kneeling stance for more challenge.
- Full Push-Ups: Advance to full push-ups on the back of your hands once mobility and strength allow.
Benefits
- Improves wrist extension mobility.
- Builds strength in underused forearm muscles.
- Balances the heavy flexion loads from other training.
Aim for 10–15 controlled reps, always prioritizing slow, deliberate movement to protect your joints.
4. Fist Swings
Fist swings focus on adduction and abduction movements of the wrists—critical for stability on apparatus like parallel bars or rings. They also help condition your wrists for shifts in load during dynamic movements.
How to Perform Fist Swings
- Positioning: Support yourself on fists, hands shoulder-width apart.
- Execution: Rock forward and backward, shifting weight onto the sides of your fists. Keep elbows straight when rolling forward, and allow a slight bend when rolling backward.
Progressions
- Wall Support – Begin with light weight against a wall.
- Kneeling Support – Transition to the floor with kneeling support.
- Kneeling Push-Up Position – Increase load while maintaining balance.
- Full Push-Up Position – Perform fist swings in a full push-up stance.
Training Guidelines
- Perform 10–15 repetitions per set.
- Practice on a soft surface to protect your knuckles.
- Stay active in your wrists; avoid passive rolling.
Building a Routine
To maximize results and keep your wrists pain-free:
- Warm up first: Do mobility drills (circles, gentle stretches) before loading.
- Perform 2–3 of these exercises per session: Rotate them across the week.
- Stick to 10–15 reps for 3–5 sets: Consistency is more important than volume.
- Progress slowly: Only advance when reps feel controlled and pain-free.
- Listen to your body: Any sharp pain is a red flag—back off and regress.
Train them regularly, progress gradually, and you’ll build wrists that are reliable for years to come.