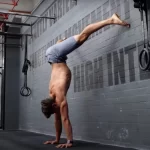
A handstand kick-up helps you get into a handstand by kicking your legs up into the air. It’s hard to nail that perfect upside-down position without a strong kick-up.
You might wonder why the kick-up is so important. Well, think of it as the foundation for your handstand.
The kick-up gives you the momentum and balance to get your legs over your head. It’s what separates wobbling and falling from gracefully holding a handstand. A good kick-up lets you control your body, find your center of gravity, and stay stable.
Why Kick-Up Is Important for Beginners?
Starting with the kick-up can be tricky, especially if you’re new to handstands and don’t have a solid foundation yet.
Beginners often keep trying to kick up, relying on luck to get it right. They might hit the perfect spot once, but then struggle to replicate it next time.
Instead, you should use a systematic approach to track your progress and identify what went wrong, allowing you to adjust for the next attempt. This way, you can achieve consistent entries, making it easier to hold the handstand.
Phase 1: Weight Transfer
The first step, or phase one, involves either starting from a standing position or placing your hands on the floor. Starting from a standing position is often preferred because it gives you the momentum needed for an easier entry. But you can choose whichever version works best for you—the theory is the same.
Warming Up and Getting a Feel for the Movement
In the first phase, focus on warming up by gently lifting your legs off the floor. Get used to the feeling of having your hands on the ground and your legs in the air, even if it’s just for a brief moment.
So, let’s begin. Start standing, with one leg forward and one leg back. The back leg will carry your weight up, while the front leg bends and propels you into the air. Here’s how to do it:
- Place your hands on the floor.
- Keep the back leg straight as you kick up.
- Notice how, when you come back down, your legs switch positions in mid-air.
Practicing on Both Sides
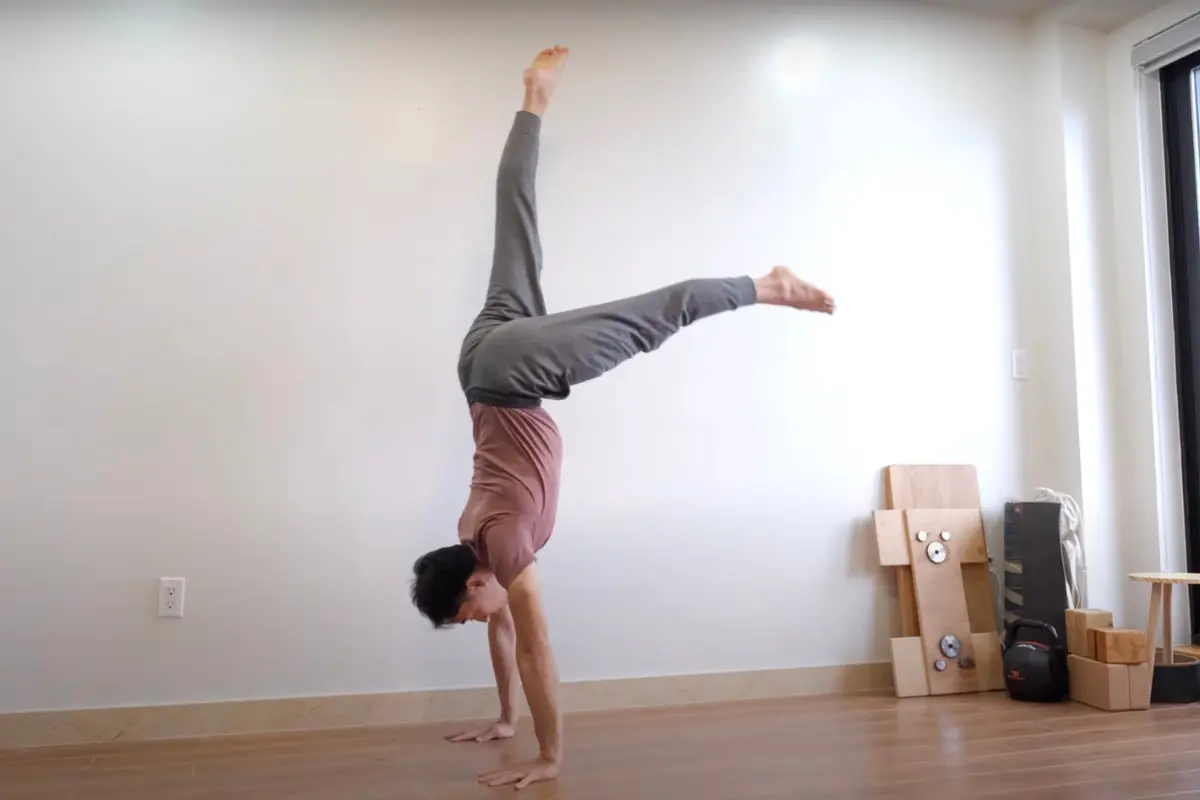
Now, try it on the other side. This time, have your right leg in front, which will bend, while the left leg in the back stays straight and extends upwards. You’re not trying to go all the way to a full handstand yet. Just aim to lift off the floor a bit, letting your legs do their part. One leg is straight, the other is bent, and you transfer your weight from your feet to your hands.
- Observe how one leg bends and the other straightens.
- Then the bent leg straightens, and both legs form a V shape in the air, switching as you land.
- Push off with your hands, the front leg bends and straightens, creating momentum. Both legs go up into a V shape until they reach a straight line.
- Push the floor away with your hands, lock your elbows, and look directly between your hands.
Building Consistency and Strength
Let’s do it again. Hands on the floor, look between your hands, the front leg bends and then straightens, creating momentum. Both legs lift into the air, arms extending and pushing. Keep repeating: bend, straighten, and feel the lightness.
Use the back leg to carry yourself up, the second leg joins, and then come back down. Get used to the weight on your hands, extending from your shoulders, and aiming for a long, strong body.
Summary of Phase One
Lifting your legs off the floor just a bit, one leg straight, the other bent, then both straightening in the air, while your shoulders extend and you look down between your hands.
Phase 2: Finding Air Time
In phase two, the goal is to go even higher and achieve more air time. This added height helps you stack your body for better balance, without closing your legs.
Now, you’re focusing on aligning your shoulders and hips while your legs move in the air. The more air time you have, the better your stack and balance will be.
Achieving More Air Time
Let’s try it, starting off the same way as in phase one. Go up, then come back down. Notice that there is more air time compared to phase one.
What’s different is that your legs are higher, and your body is more stacked. You’re able to extend further forward and go higher. The more you do this, the better your balance becomes, even while in motion.
Switching Legs for Balance
Let’s try that again. It’s important to switch legs in the air because every time you switch legs, you create a balanced position. If you don’t switch legs, you might tend to pike and push your hips forward, making it harder to come back down the same way.
You want an even exchange of weight each time you go up or down. So, remember to switch: push your legs up, switch slowly, come back down, and switch again.
Summary of Phase Two
In phase two, focus on increasing air time, switching legs, and demonstrating good technique. This will help you achieve better balance and control in your handstand.
Phase 3: Finding The Stack
In the third phase, the goal is to bring your feet together in the 12 o’clock position for just one second. This brief hold helps you find and maintain balance without the pressure of holding for an extended time.
Many people aim for holds of five, ten, or even thirty seconds, which are great goals. However, initially, you want to find that balanced position easily. If you can consistently hold for one second in a straight line, extending that hold to three or five seconds will become much easier with practice.
Trying to hold for ten seconds right away might work occasionally, but it’s not consistent. The aim is to build good habits so that when you kick up, you naturally land in the right position and can start your holding process from there.
Achieving the 12 O’Clock Position
Start by bringing your legs together for one second in the 12 o’clock position. The technique should remain the same: one leg bends and then straightens as you go up, while the other leg stays straight and carries your body into position.
The back leg, which is the lead leg, should reach the 12 o’clock position first, followed by the secondary leg joining it.
It doesn’t matter which leg leads, as you will switch sides. The key is that the front leg, the one that bends, always joins the lead leg at 12 o’clock. Focus on aligning your straight back leg and then bringing the bent leg to meet it.
Building Consistency and Technique
Initially, it’s okay if you don’t reach the 12 o’clock position perfectly. You might end up at 11 or 10, but with practice, it will become easier to find the correct spot.
Focus on technique: legs straight, toes pointed, arms straight, and eyes looking down at the floor. Tap into the position and hold briefly, repeating this until it becomes consistent.
With your lead leg reaching the 12 o’clock position and your secondary leg joining, you should find yourself in a perfectly straight handstand.
Putting It All Together
Start standing, place your hands on the floor, and push up with your lead leg reaching the 12 o’clock position. The secondary leg should follow and meet the lead leg.
In real-time, your first leg reaches 12 o’clock, your second leg follows, your shoulders extend, and then you come back down.
Key to a Successful Kick-Up: Systematic Training
The key to mastering the kick-up is to have a very systematic way of training. You don’t want to gamble by going up and hoping for the best. Instead, you need to know exactly what your legs, shoulders, and body are doing to achieve good alignment.
It’s okay if your alignment is a little off in the beginning. As you develop control over time, you can start modifying your line little by little.
If you can’t even go up and hold initially, it will be impossible to perfect your line and alignment. Therefore, the key is to overcome fear, build confidence, and establish good technique. This is the best way to approach training handstand techniques, regardless of your level.
Developing Good Habits
Consistency: Practice consistently to build muscle memory and confidence.
Technique: Focus on proper technique to ensure you know what every part of your body should be doing.
Patience: Understand that perfecting your handstand will take time. Be patient with your progress.
Conclusion
Whether you’re working on the kick-up, press-up, or one-arm handstand, the process progresses similarly. Never leave it up to luck or chance. Instead, grow good habits, build your technique, and have patience in your journey. With time and practice, you will develop the control and confidence needed for successful handstands.