How to Do a Handstand on Beam: Steps, Drills and Common Mistakes
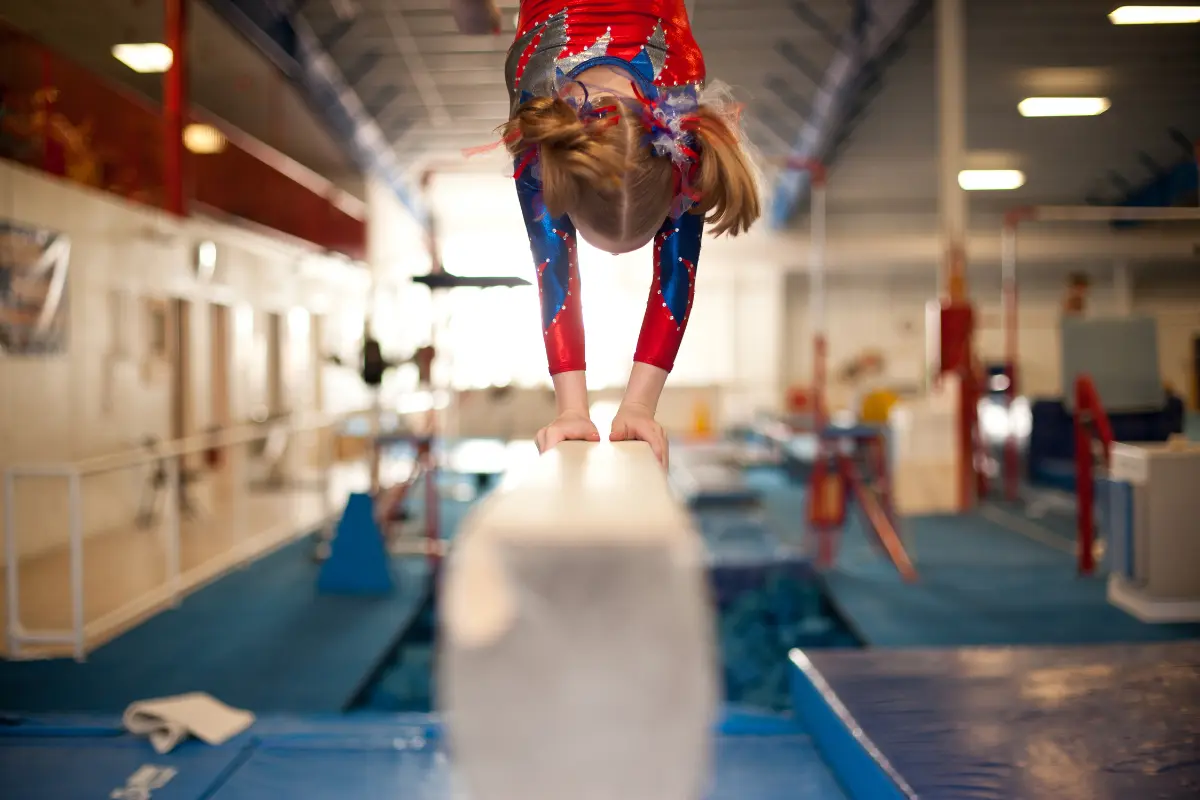
A handstand on beam uses the same basic action as a floor handstand: reach from a lunge, lift the rear leg, bring the legs together above the hands, then step back down. The harder part is keeping that movement on a narrow line. A sideways kick or an uneven hand placement leaves much less room for correction.
Contents
This guide covers a handstand facing along the beam, followed by a return to standing on it. It is a coached gymnastics skill. Start with the floor version and an appropriate low, padded setup; a successful attempt on the floor does not automatically make a high-beam attempt the next step.
What should be comfortable before a beam handstand?
A useful starting point is a repeatable floor handstand: the gymnast can support their weight on straight arms, control the kick and return without collapsing. The coach also needs to see how the gymnast handles an attempt that does not reach vertical or travels too far. There is no universal number of seconds that proves readiness for beam.
The difference between one lucky balance and a controlled skill matters here. If the hands land somewhere different on every attempt, or the legs sweep around the side, moving to a narrow surface magnifies the problem. Work on that specific part of the entry first.
Learn the hand position before adding the kick
On the floor, the hands usually have room to sit about shoulder-width apart. On beam they come much closer together, with the fingers able to curve around its sides. The coach should check that the palms have support and that the gymnast can press through both arms comfortably. Do not discover the grip for the first time halfway through a kick-up.
For the Level 4 compulsory cross handstand discussed below, staggered hands are a specific fault. That is a requirement for this element, not a statement that every handstand variation in gymnastics must use the same grip.
How to do a handstand on beam
The entry should travel along the beam rather than turning into a sideways cartwheel. Think about the path of the hands and feet together: reaching accurately is only half the job if the returning foot misses the same line.
| Phase | Movement to understand | What to watch |
|---|---|---|
| Lunge and reach | Begin facing along the beam, with the arms lifted. As the body tips forward, the rear leg rises behind. | The trunk and lifting leg travel together without the hips turning sideways. |
| Take weight through the hands | Place the hands in the established grip; the supporting foot pushes as the rear leg continues upward. | The arms stay straight rather than bending as the body arrives over them. |
| Find the balance | Bring the second leg up to meet the first above the shoulders and hands. | The legs meet without a large back arch or a last-second sideways swing. |
| Return to the beam | Separate the legs, lower the returning foot to the beam and lift the chest into the finish. | The foot comes back on the line and the hands release as support transfers to the foot. |
Keep the head aligned with the arms and look toward the hands. Throwing the head back to search for the far end of the beam can change the shoulder and back position. Reaching tall through the arms helps keep the shoulders from sinking toward the hands.
The “T” is a useful entry check
Before the hands touch, the rising rear leg and the forward-reaching upper body pass through a roughly horizontal line. Coaches often call this a T position. It helps identify a sideways leg swing or a chest that drops ahead of the leg. It is a checkpoint within the movement, not necessarily a pose to stop and hold in every routine.
The step-down is part of the skill
Returning to stand on the beam is an exit from the handstand, not a dismount from the apparatus. A dismount leaves the beam and lands on the mat. Keep those tasks separate while learning.
For the normal return, lower one leg deliberately instead of letting both feet drop together. As that foot takes weight, lift the chest and arms to regain the standing position. The coach chooses the finish and teaches how to handle an overbalanced attempt; the planned step-down is not a universal escape from every fall.
Watch the hand placement and return
This short GymnasticsHQ demonstration shows the entry, close hand placement and return with on-screen explanations. Watch around 0:42 for the hands and around 0:55 for the step-down. Compare the foot's path with the beam, rather than looking only at how long the gymnast stays upside down.
The clip demonstrates the movement; it does not establish that its room, mat arrangement or equipment suits another gymnast. Choose the practice setup with the coach.
Drills with a clear purpose
Choose a drill for the part that needs work, rather than repeating full attempts with the same miss. The following are coaching tasks, not an automatic progression to complete alone.
| Task | Purpose | Useful observation |
|---|---|---|
| Lunge-to-T and return on a floor line | Coordinate the reach and rear-leg lift before inversion. | Does the pelvis stay facing the line? |
| Floor-line handstand with a planned step-down | Practice accuracy at both ends of the skill. | Do the hands and returning foot find the same path? |
| Coach-supported handstand on a secured low beam | Introduce the narrower grip without changing every part of the task at once. | Can the gymnast maintain straight-arm support and a controlled return? |
A coach may separate the entry, balance and return into different exercises. More repetitions are not automatically better if fatigue makes the elbows bend or the kick become unpredictable.
When should the beam get higher?
Height should follow demonstrated control and an appropriate setup, not a deadline. Secure equipment, adequate landing mats and supervision matter at every height. The American Academy of Orthopaedic Surgeons' gymnastics guidance emphasizes proper equipment and preparation for new skills. Stop for pain rather than treating it as a confidence problem.
If the gymnast changes the entry as soon as the beam is raised, return to a version where the intended action is repeatable. Our low-beam to high-beam guide covers that transition in more detail.
Common mistakes worth checking
- The legs drift sideways: inspect the lunge and rear-leg path before asking for a harder kick.
- The gymnast goes straight over: review the amount of kick and body alignment. A longer hold target does not fix an uncontrolled entry.
- The elbows bend: reduce the task and check hand placement, support and fatigue with the coach.
- The balance looks good but the return wobbles: give the step-down its own practice attention instead of ending every drill at vertical.
Change one part at a time. A short side-view recording, when gym policy permits it, can help the coach and gymnast see whether the problem begins before the hands arrive or during the return.
How long must the handstand be held?
That depends on the element and program. In the current USA Gymnastics Level 4 compulsory beam routine, the cross handstand requires a one-second hold. Its specific faults include failing to reach vertical, failing to join the legs, staggered hands and an insufficient hold. Holding longer does not add bonus to that element.
Practice duration serves a different purpose from a competition requirement. Follow the target for the actual routine rather than applying “one second” to every beam handstand. The Levels 1–5 beam requirements guide explains the broader progression.
Final Takeaway
A good beam handstand includes an accurate entry, supported balance and controlled return. Establish the hand position, keep the movement on the beam's line and give the step-down as much attention as the upside-down position. Height and longer holds come after the coach can see control throughout the skill.
Main Sources
- USA Gymnastics: current compulsory program and updates, read with the July 2023 replacement pages, Level 4 beam penalty table, Pen–33.
- NRG Developmental Gymnastics: beam-handstand teaching notes, for alignment and supervised progression context.
- GymnasticsHQ: handstand-on-beam demonstration and companion explanation, for visual movement guidance rather than USAG rules.