Floor is where a gymnast learns to blend tumbling, dance, and control into one routine. In the USA Gymnastics (USAG) Women’s Development Program (DP), Levels 1–3 are meant to build safe basics and consistent shapes, while Levels 4–5 introduce the full compulsory-style floor routine with more demanding skills.
- How to Use This Guide
- Quick Floor Rules
- Level 1 Floor Requirements (DP Level 1)
- Level 2 Floor Requirements (DP Level 2)
- Level 3 Floor Requirements (DP Level 3)
- Level 4 Floor Requirements (DP Level 4)
- Level 5 Floor Requirements (DP Level 5)
- what’s the progression from Level 1 → Level 5?
- Official USA Gymnastics Sources
Below is a level-by-level breakdown of what’s required on floor in the 2021–2029 compulsory cycle, plus what judges care about most at each level.
How to Use This Guide
Before jumping into the level-by-level breakdown, here’s how to read the breakdown so it actually makes sense.
Major elements
These are the required skills that form the backbone of the routine. Every compulsory floor routine is built around them. If a major element is missing, replaced with the wrong skill, or performed incorrectly, judges can apply larger penalties. These deductions are usually much bigger than small form errors.
Reversal allowed
This simply means a skill can be performed on the opposite side (right vs. left). For example, a left-handed cartwheel or a turn going the opposite direction is perfectly acceptable, as long as the rest of the routine stays correct. This is common for left-dominant gymnasts and does not affect difficulty when done properly.
General floor deductions (apply at all levels)
Across Levels 1–5, judges also evaluate how the routine is performed, not just which skills appear. This includes:
- Body shape (tight core, straight legs, pointed toes)
- Split angles on leaps and jumps
- Control on landings and finishes
- Rhythm and flow between skills
These deductions add up quickly and often matter just as much as the skills themselves.
Quick Floor Rules
A few rules account for a surprising number of deductions:
- Stepping out of bounds: each time 0.10 (any part of body touching outside the border).
- No music / wrong music: 1.00 if performed without music or with music that includes voice.
- Presentation: 0.10 for failure to present before and after.
- Long pauses: floor has concentration pause deductions when pauses reach the “two seconds or more” range.
- Covered boundary lines: If additional mats cover the floor border, the boundary must be clearly marked on the mat, or a 0.10 penalty applies.
These aren’t “skill” mistakes, but they can change placements quickly.
Level 1 Floor Requirements (DP Level 1)
Level 1 is about “can you control your body on the floor” more than power. Judges want tight shapes, basic inversion, and a few clean movement patterns that set up later tumbling.
Required major elements (what must appear)
- Cartwheel (reversal allowed)
- Backward roll (tucked)
- Candlestick
- Forward passé balance
- Forward chassé
- Stretch jump
- Forward roll (tucked)
- 3/4 handstand (reversal allowed)
Common “early level” deductions to watch
Even at Level 1, judges are watching for the same big themes:
- bent arms and soft shoulder support
- loose core / arched back instead of hollow/straight body
- lack of control (wobbly finishes, extra steps, rushed rhythm)
(Small things like feet, knees, and finishing positions add up fast on compulsory floor.)
➡️ Recommended Level 1 Floor Routine
Level 2 Floor Requirements (DP Level 2)
Level 2 starts connecting movement more intentionally and adds more specific “gymnastics dance” positions while keeping tumbling very foundation-based.
Required major elements
- Cartwheel (reversal allowed)
- Backward roll to push-up position
- 1/2 turn in forward passé (heel-snap turn) (reversal allowed)
- Forward chassé
- Straight leg leap (60°)
- Split jump (60°)
- Handstand (reversal allowed; must hit vertical and show control)
- Candlestick
- Bridge, back kick-over (reversal allowed)
What judges are really evaluating at Level 2
- Turn technique: finishing cleanly and under control (no sloppy heel-snap shortcuts)
- Leap/jump shape: even if the angle is “only” 60°, they want pointed toes, straight legs, and posture
- Bridge kickover mechanics: shoulders supporting the bridge, one controlled kick, no “panic kicks”
➡️ Recommended Level 2 Floor Routine
Level 3 Floor Requirements (DP Level 3)
Level 3 is a big bridge level: you still see basics, but now the routine pushes control during longer sequences, plus a clearer backward tumbling progression.
Required major elements
- Handstand forward roll (reversal allowed)
- Straight leg leap (90°)
- Stretch jump connected with split jump (90°) (connection matters)
- Handstand to bridge, back kick-over (reversal allowed)
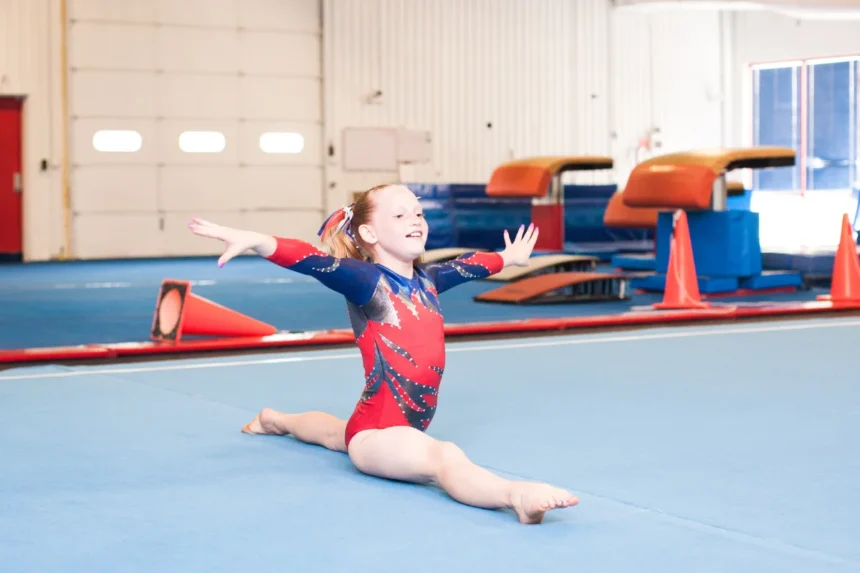
- Forward split
- 1/2 turn in forward passé (reversal allowed)
- Backward roll open to 45° above horizontal, lower to push-up position
- Round-off (reversal allowed)
- Flic-flacs (back handsprings) to two feet (series; details + rhythm matter)
Key Level 3 scoring pressure points
- Handstand positions: judges can take up to 0.30 if the handstand doesn’t reach vertical on skills like the handstand forward roll.
- Split positions: the routine includes a forward split that’s expected to be close to flat 180° (this is where flexibility shows up on the score).
- Round-off BHS: judges want a clean snap-down, rebound, and straight body line, not a sideways, bent-knee whip. (There are specific deductions for things like not landing together or failing to rebound.)
➡️ Recommended Level 3 Floor Routine
Level 4 Floor Requirements (DP Level 4)
Level 4 adds more dynamic acro, clearer leap/jump expectations, and a more structured back tumbling line.
Required major elements
- Back walkover (150° split) (reversal allowed)
- Front handspring step-out (reversal allowed)
- Cartwheel (reversal allowed)
- Straight-arm backward roll to handstand
- Stretch jump 1/2 (180°) turn (reversal allowed)
- Straight leg leap (120°)
- Straddle jump (120°)
- Forward split
- 1/1 (360°) turn in forward passé (reversal allowed)
- Round-off (reversal allowed)
- Flic-flacs to two feet (series)
Where Level 4 scores are often won or lost
- Back walkover split + leg lift continuity: judges can deduct if the leg lift isn’t continuous or the split is short of the intended angle.
- Front handspring step-out: it’s not just “do a front handspring.” The step-out matters; there are specific faults for not stepping out or for staggered hands.
- Stop between elements in a tumbling pass: stopping between major elements in an acro pass can be hit with a 0.30 rhythm deduction.
➡️ Recommended Level 4 Floor Routine
Level 5 Floor Requirements (DP Level 5)
Level 5 is the first time many gymnasts feel like floor demands both real tumbling power and real dance amplitude. It also includes a major opening acro choice that changes the feel of the whole routine.
Required major elements
Opening acro (one of these options):
- Front salto tucked OR free aerial cartwheel OR free aerial walkover forward (front aerial) (reversal allowed where applicable)
Acro series + shaping:
- Front handspring step-out x2 (reversal allowed)
- Cartwheel (reversal allowed)
- Straight-arm backward roll to handstand
Dance / flexibility:
- Stretch jump 1/1 (360°) turn (reversal allowed)
- Straight leg leap (150°) OR switch leg leap (150°)
- Straddle jump (150°)
- Forward split
- 1/1 (360°) turn in forward passé (reversal allowed)
Final tumbling line:
- Round-off (reversal allowed) → flic-flac → backward salto tucked (back tuck)
What makes Level 5 “feel hard”
- The salto has to look like a salto (real set, real rotation, clean body position, not a panicky chuck)
- Dance angles matter more (150° targets are where flexibility and leg line get judged)
- The back-tuck ending exposes basics: if the round-off/BHS is low or rushed, everything downstream gets messy
➡️ Recommended Level 5 Floor Routine
what’s the progression from Level 1 → Level 5?
- Levels 1–2: shapes, basic locomotion, first inversions
- Level 3: longer sequences + true backward tumbling rhythm
- Level 4: bigger split and amplitude demands + stronger series control
- Level 5: optional opening acro choice + back-tuck line + 150° dance amplitude
This progression matches how USA Gymnastics structures the compulsory program itself, using official music, videos, and compulsory materials to build floor skills step by step across the full cycle.
Official USA Gymnastics Sources
W316: 2021-2029 Women’s Development Program Compulsory Materials
👉 https://members.usagym.org/pages/education/courses/W316/
2021-2029 Women’s Development Compulsory Program (physical books & digital materials):
👉 https://usagym.org/women/development/compulsory/
Levels 1–3 Compulsory Event Deductions (2021–2029)
👉 https://nawgj.org/wp-content/uploads/2021/07/1-3-Compulsory-Event-Deductions-2021-2029.pdf
Levels 4–5 Compulsory Event Deductions (Updated 6-22-21, 2021–2029)
👉 https://nawgj.org/wp-content/uploads/2021/06/4-5-Compulsory-Event-Deductions-Updated-62221-2021-2029.pdf