How to Do a Back Handspring: Steps, Drills and What Coaches Look For
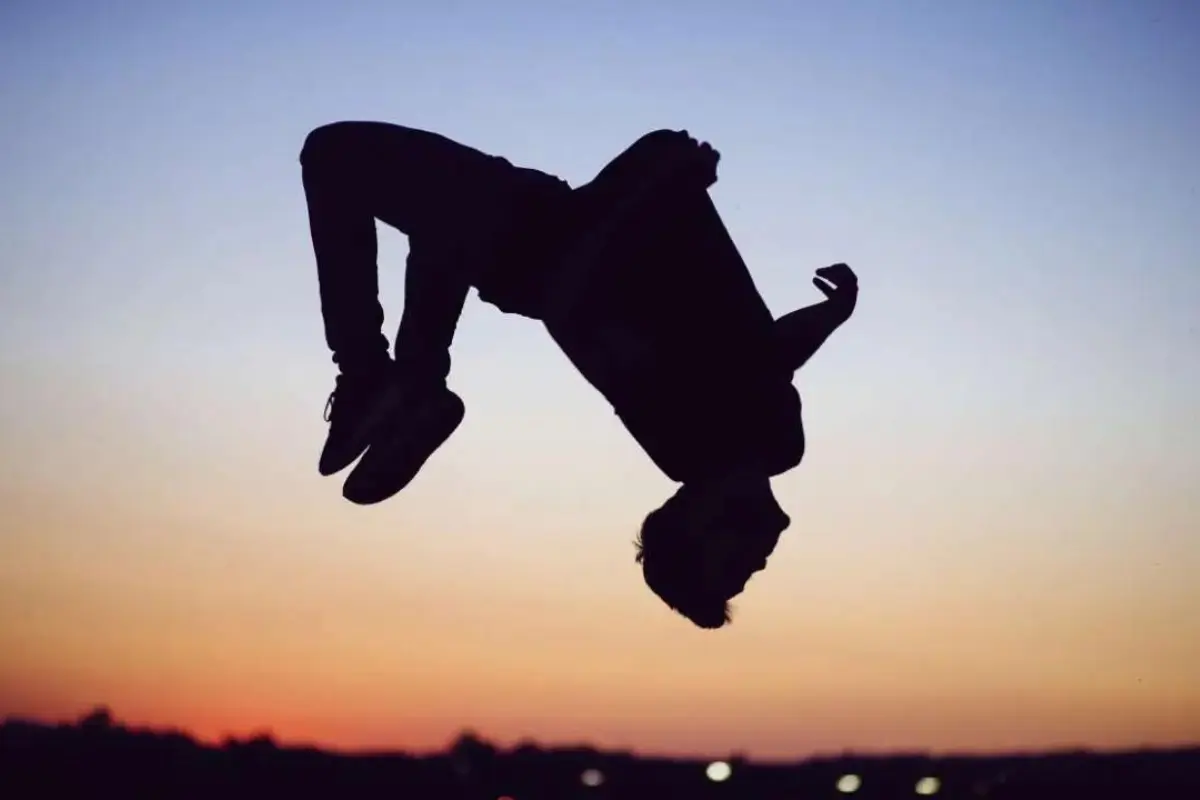
A back handspring is a backward jump onto the hands followed by a push back to the feet. It is the move people often mean by a “backflip with hands.” Gymnastics calls it a back handspring or flic-flac; a backward somersault turns through the air without hand support.
Contents
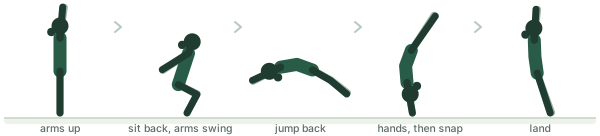
The useful question for a learner is how those two flights connect: feet to hands, then hands to feet. A good attempt does not stop in a bridge or held handstand. The jump, brief hand support and snap-down form one continuous movement. Here is what happens in each phase, how coached drills separate the tasks and what common problems look like.
The Back Handspring at a Glance
| Phase | What happens | Useful observation |
|---|---|---|
| Takeoff | The legs drive the body backward while the arms reach overhead | A purposeful jump, rather than a drop into the hands |
| First flight | The feet have left the floor and the hands have not yet arrived | The body travels toward the hand contact |
| Hand support | The arms and shoulders support and push the moving body | Supported elbows and continuous movement |
| Second flight and landing | The hands leave; the legs snap down toward the feet | A coordinated arrival suited to the planned finish |
A slow backward movement with the legs separating into a step-over is usually a back walkover. For the wider naming comparison, see walkovers, handsprings and aerials.
What to Learn Before a Back Handspring
A coach assesses the gymnast's ability to support weight on the hands, move through the shoulders, produce a coordinated jump and keep an organized body shape. Those abilities matter more than reaching a particular birthday or collecting a fixed list of skills.
- Hand support: a controlled handstand gives useful information about straight-arm support and overhead alignment. Our handstand guide explains that preparation.
- Shoulder movement and body control: the gymnast needs to reach overhead without making all the movement happen in the lower back. Familiar, coach-selected bridge work may help assess this; a bridge alone does not prove readiness.
- Takeoff coordination: the arm action and leg push need to work together. A powerful jump can still produce a poor handspring if its direction or timing is unsuitable.
- The intended entry: a round-off connection needs a usable round-off exit. That is a different demand from starting at a stand.
A back walkover can provide experience going backward over the hands, but it is not a universal prerequisite. The coach also considers confidence, previous injuries and the training setup. The American Academy of Orthopaedic Surgeons recommends assessing preparation before a new gymnastics movement.
Watch Back Handspring Drills
This USA Gymnastics University video shows several training stations. Notice how an exercise can isolate the jump before a later station includes the whole handspring. The demonstrations use gymnastics equipment selected for the task; the sequence is not a prescribed home lesson or a readiness test for every beginner.
How to Do a Back Handspring, Step by Step
These steps describe a standing, two-foot back handspring in a coached gym lesson. Matting, assistance and the entry are adjusted to the gymnast.
- Set the starting position. Begin balanced, with the feet in the position the coach is teaching. Coordinate the arm swing with the preparation instead of rushing one ahead of the other.
- Bend and drive. Bend the legs for the jump, then extend them as the arms move overhead and backward. The hips should not simply sink while the gymnast reaches behind for the floor.
- Travel backward toward the hands. The takeoff carries the body into the first flight. Keep the head organized with the body; throwing it back does not substitute for a usable jump.
- Support and push. The hands contact the surface as the body passes through inversion. Maintain straight-arm support and active shoulders, then push away rather than settling into a handstand.
- Snap the legs toward the landing. The legs return as the hands release. In a two-foot version, the feet arrive together. The chest and hips must organize for the exit, rather than leaving the gymnast folded forward.
- Finish the assigned task. Complete the controlled landing, rebound or connection chosen for that exercise. Changing the finish halfway through can change the entire attempt.
The “snap” is not a separate kick added after a pause on the hands. It describes the quick transition out of hand support. Watching the full movement once, then watching only the hands leaving and feet arriving, can make that timing easier to recognize.
Standing vs. round-off back handspring
A standing back handspring begins without a running entry. Its arm action and leg drive must organize the takeoff from that start. A round-off back handspring already has movement from the previous skill, so it needs an immediate, well-directed connection.
This difference explains why a gymnast might perform one version more confidently than another. It also explains why the deep preparatory bend seen in a standing exercise should not automatically be copied between linked skills. In the women's Level 3 compulsory floor sequence, an excessive squat into the back handspring is a listed fault.
Step-out or two feet
A step-out lands one foot and then the other on purpose. A two-foot version closes to a simultaneous landing. Do not treat an intentional step-out as an uneven version of the other skill. Floor passes and beam combinations may use different forms, and the coach identifies which is being taught.
What comes next
The next goal might be a more consistent standing skill, a smoother round-off connection or a series of handsprings. It does not have to be a new flip.
Drills Coaches Use
A useful drill has a specific job. Ask what the gymnast is trying to change and what would count as improvement before treating another repetition as progress.
| Training task | Purpose | What to notice |
|---|---|---|
| Jump preparation, including the flat-back station shown in the video | Separate takeoff coordination from hand contact | How the arm movement and leg push work together |
| Coach-selected handstand and snap-down work | Focus on leaving the hands and returning to the feet | Whether the exit flows or collapses into a low landing |
| Assisted whole-skill practice | Connect the phases with the necessary support | Which phase still depends on assistance |
| A whole handspring on a suitable training surface | Repeat the movement under the conditions chosen for the lesson | Consistency of direction, support and finish |
The tumbling trampoline in the video changes the exercise's conditions. Success there is useful information, but it does not automatically transfer to an unassisted handspring on the floor. Nor does a shaped mat establish one correct setup for every gymnast. For what assistance should involve, see our guide to gymnastics spotting.
Common Mistakes and What Judges Deduct
| What you see | What to investigate | A useful teaching focus |
|---|---|---|
| A short, low first flight | Takeoff timing and direction, not only leg strength | Return to the jump task |
| Elbows bend noticeably under support | Entry position, shoulder action and support capacity | Reduce the task and rebuild supported movement |
| The chest remains low as the feet land | The push from the hands and the timing of the exit | Isolate the support-to-feet transition |
| Feet arrive at different times in a two-foot version | Leg closure and body alignment through the skill | Make the intended landing clear |
| A connected pass stops before the handspring | The incoming skill and confidence in the connection | Rebuild that connection under appropriate assistance |
For competition context, the women's Level 3 floor text lists up to 0.30 for a squat into the back handspring and 0.10 when its feet do not land simultaneously. Its required rebound has separate penalties. Those are requirements for that routine, rather than rules for every training drill. Use the Level Requirements Finder for the full sequence.
Safety
Learn the skill with a qualified coach and appropriate gymnastics equipment. A mattress or a friend trying to lift the gymnast does not reproduce a supervised training station. At home, use only the familiar preparation specifically agreed with the coach; do not assume that a conditioning exercise or stretch suits everyone.
Stop an attempt if it causes pain. Persistent back or wrist symptoms need assessment rather than more repetitions or a deeper arch. The AAOS identifies upper-body loading and repeated bending as injury concerns in gymnastics. A coach can modify training, while a qualified clinician assesses an injury.
Common Questions
What level is a back handspring in gymnastics?
In USA Gymnastics' women's Development Program, it appears after a round-off on Level 3 floor. This is a competition requirement, not a minimum age or universal starting point for learning the skill.
How long does it take to learn a back handspring?
There is no reliable number of lessons. Progress depends on preparation, training opportunities and the version being learned. Track a more specific change, such as less assistance in one phase or a more consistent landing, rather than comparing calendars with a teammate.
Final Takeaway
A back handspring connects a backward jump, brief hand support and a return to the feet. Learn what each phase contributes, then use focused drills to improve the part that breaks down. A standing version, a round-off connection and a step-out each have their own demands; completing one does not automatically establish the others.
Main Sources
- USA Gymnastics University: Backhandspring Drills: visual examples of training stations and entries.
- USA Gymnastics Gymnastics 101 glossary: flic-flac, back handspring and flip-flop terminology.
- USA Gymnastics compulsory replacement pages, July 2025: Level 3 floor movement description and penalties.
- USA Gymnastics compulsory replacement pages, July 2024: beam step-out developmental description and beam forms.
- USA Gymnastics compulsory program and updates: current materials and subsequent replacement pages.
- American Academy of Orthopaedic Surgeons: Gymnastics Injury Prevention: preparation, supervision and injury precautions.