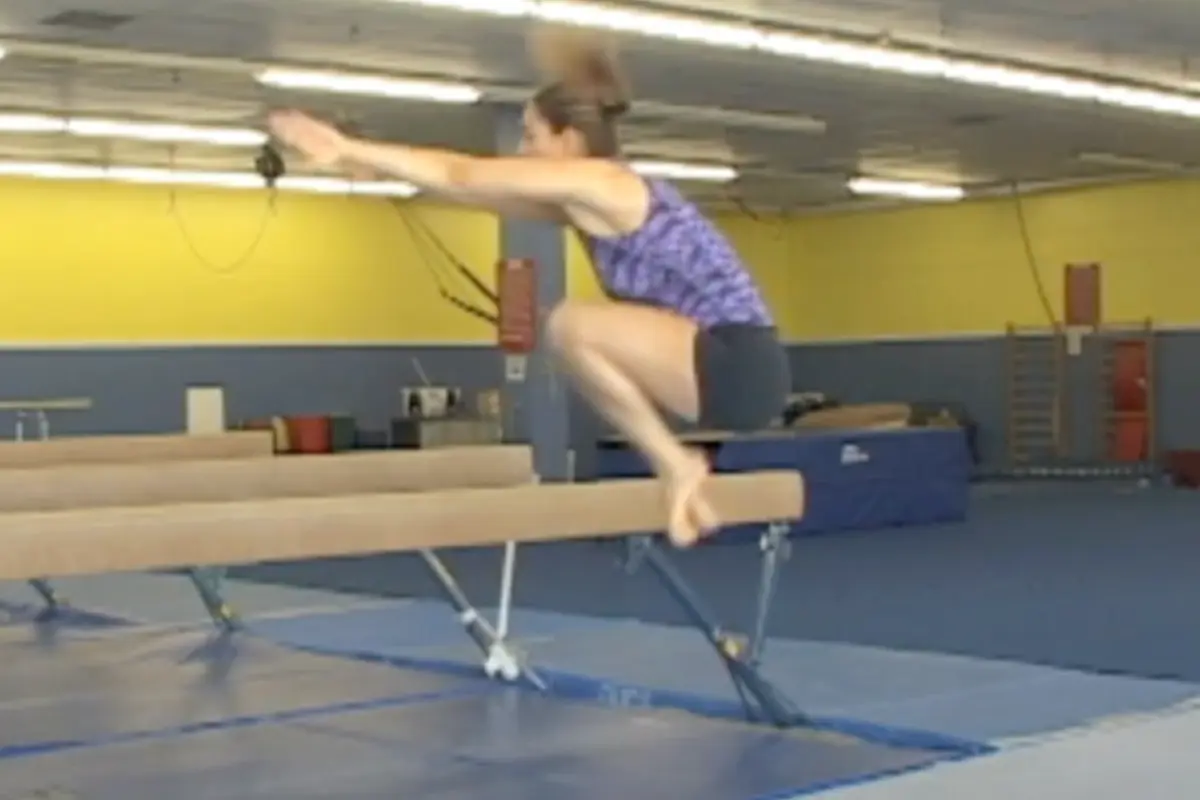
A tuck jump is a skill where a gymnast jumps into the air, tucks their knees towards their chest, and lands softly with bent knees. It’s a basic yet essential move that forms the foundation for more advanced skills in gymnastics.
The main goal is to create a compact shape that minimizes air resistance, allowing the gymnast to rotate faster during flips or rolls. Learning the correct form early is key to avoiding mistakes as you progress.
One of the most common mistakes gymnasts make is tucking their knees towards their bottom instead of their chest. This seemingly small error can significantly impact the jump’s effectiveness and the gymnast’s control.
The Problem with “Knee-to-Bottom” Tucking
Bringing the knees towards the bottom, rather than the chest, creates a backward pull in the body. This hinders jump height, disrupts balance, and can even lead to strain on the lower back. Instead of a powerful, controlled jump, the gymnast ends up with an awkward, less efficient movement.
The Correct Technique: Knee-to-Chest
Imagine your knees are trying to “hug” your chest. This forward motion creates a tighter, more compact tuck, allowing for:
- Increased Height: A tighter tuck reduces air resistance and improves rotational speed, leading to a higher jump.
- Better Control: Bringing the knees forward shifts the center of gravity, making it easier to maintain balance and control the landing.
- Reduced Injury Risk: Correct form minimizes strain on the lower back and knees.
Here’s a step-by-step guide to achieving the perfect tuck:
- Explosive Jump: Initiate the jump with a powerful upward thrust, extending through the ankles, knees, and hips.
- Forward Knee Drive: As you ascend, forcefully drive your knees upwards towards your chest.
- Tight Tuck: Hold the tuck position briefly at the peak of the jump, keeping your core engaged and your body compact.
- Soft Landing: Land softly with your knees bent to absorb the impact. This protects your joints and prepares you for the next jump.
Why Landing Correctly Matters
Landing with bent knees is crucial for injury prevention. It allows your muscles to act as shock absorbers, reducing the stress on your joints. A proper landing also helps you maintain balance and transition smoothly into subsequent movements.
Front Tuck vs. Back Tuck: Key Differences and How to Master Each
The front tuck and back tuck are two of the most fundamental skills in gymnastics, often performed on the floor, trampoline, and even during vaulting. While both involve tucking the body into a tight ball mid-air, the direction of the flip and the technique involved are quite different.
What is a Front Tuck?
A punch front (or front tuck) is a forward somersault in the air, starting with a quick punch off the toes and followed by a tight tuck to complete the rotation.
The punch front begins with a simple concept: it’s essentially a jump off the ground (the “punch”) combined with a forward roll motion. To execute this skill well, you need to understand two major components:
- Toe Angle and Arm Position: As you punch off the ground, your toes should be angled in front of you while your arms are lifted upwards. This setup is critical for achieving maximum height during the jump. A common mistake is dropping the chest and throwing the arms downward, which reduces height and makes the flip less controlled.
- The Forward Roll Shape: Using a forward roll to learn the body shape required for a punch front helps develop muscle memory. You should focus on driving your hips over your head during the roll, simulating the same movement used in a punch front.
Focus on Height and Rotation Speed
Height and speed are critical to successfully executing a punch front. The faster and higher you can flip, the better control you’ll have throughout the motion.
Lift Your Arms: As you jump, think about “reaching into a cookie jar,” lifting your hands high in front of you. This ensures that your arms help propel your body upwards rather than pulling your chest downward.
Hip and Toe Drive: To increase your height and speed, focus on driving your hips and toes upward. This action increases the flip’s efficiency, allowing you to rotate faster while still maintaining control.
Common Mistakes and How to Correct Them
Opening Too Early: One of the most common mistakes when learning the punch front is opening the body too early. When this happens, the gymnast or tumbler fails to complete the rotation, leaving their toes below their head at the end of the flip. To fix this, focus on maintaining a tight tuck position and keeping the toes behind the body until the rotation is complete.
Lack of Over-Rotation: Another common issue is not finishing the flip or over-rotating enough. If you can’t fully rotate, try practicing drills where you intentionally over-rotate, landing beyond your expected position. This helps develop body awareness and prepares you to cleanly finish the move in a controlled manner.
Key Drills for Mastering the Punch Front
Donkey Kicks: A great way to build explosive power and improve the feeling of getting your hips over your head. Instead of focusing on pushing your hands down, think about driving your hips and toes upward. This drill helps build strength and body awareness necessary for the punch front.
Standing Punch Front Drill: Once you’re comfortable with the forward roll and donkey kicks, practice the punch front shape without using your hands. This helps emphasize using your core and lower body strength to drive the rotation while maintaining a controlled shape in the air.
What is a Back Tuck?
A back tuck is a backward somersault in the air. Unlike the front tuck, the gymnast jumps and rotates backward while tucking their body into a ball.
Key Steps for a Back Tuck:
- Strong Jump: The gymnast jumps upward and slightly backward, using their legs and core for lift.
- Tuck Backward: As they leave the ground, they quickly tuck their knees to their chest, pulling their body into a compact position while rotating backward.
- Spot the Landing: It’s crucial to spot the floor as they come around the flip. Since they’re moving backward, this requires body awareness and control.
- Smooth Landing: The gymnast extends their legs just in time for a soft, balanced landing with bent knees.
Mastering the back tuck requires precision in body control, especially during the set and rotation.
Two common issues gymnasts encounter are improper head positioning (commonly referred to as “head throw”) and set mistakes (when the arms and body do not move correctly during takeoff). These issues can lead to low jumps, poor rotation, or incomplete flips, increasing the risk of injury.
The Problem: Head Throw and Poor Set
Head Throw: This occurs when a gymnast throws their head backward too early during the takeoff, which disrupts the upward momentum and results in a lower jump. This habit can lead to poor rotation and uncontrolled landings.
Set Issues: The “set” refers to the initial motion of the arms and body during takeoff. A poor set, such as swinging the arms incorrectly or bending the torso forward, compromises the height and rotation needed for the back tuck.
Key Focus Areas for the Back Tuck
- Tall Set: The set refers to the initial motion of the arms and body during takeoff. A tall set ensures that the gymnast jumps upward, gaining enough height for proper rotation.
- Proper Body Shaping: The body must stay extended and open during the takeoff before tucking the knees. Correct shaping ensures that the rotation is controlled and efficient, minimizing the risk of injury.
- Safe Rotation: Using an incline helps gymnasts focus on their technique while reducing the strain on their body during the rotation.
Drill Setup Using Equipment
This drill requires the use of an incline mat and a hot spot or small mat stack. The incline assists with safe rotation, while the hot spot provides an additional bounce to encourage full body extension during the takeoff.
Equipment Needed:
- Incline Mat: Provides support during the rotation and helps simulate the rolling motion of the back tuck.
- Hot Spot/Mat Stack: Adds bounce to the takeoff, helping gymnasts extend fully before tucking.
Step-by-Step Breakdown of the Back Tuck Drill
1. Starting Position on an Elevated Surface
- The gymnast begins the drill standing on an elevated surface with the hot spot or mat stack placed in front of the incline. This setup helps the gymnast create more height during the jump, focusing on the initial extension.
2. Tall Set and Arm Position
- As the gymnast jumps, the goal is to extend their body fully and maintain an upright position during the takeoff. The arms should be by the ears, staying extended upward throughout the set.
- Key Tip: The gymnast should avoid bending forward or tucking their knees too early. Keeping the body tall during the set ensures maximum height and efficient rotation.
3. Tuck Position
- Once the gymnast reaches the peak of the jump, they begin to tuck their knees in, forming a 90-degree angle at the hips. It’s important that the knees come up without pulling the chest inward.
- Key Tip: The arms should remain by the ears, even during the tuck, to promote proper alignment and avoid premature closing of the body.
4. Controlled Rotation on the Incline
- The incline mat provides support for the rotation, guiding the gymnast safely as they roll back. The gymnast continues to roll onto their back, finishing on their hands and knees.
- Key Tip: The drill emphasizes a hollow body position during the rotation, with flat hips and the shoulders directly over the hands. This encourages strong core engagement and proper back tuck form.
Which is Easier to Learn?
For many gymnasts, the back tuck is often considered more intimidating because of the backward motion and not being able to see the floor at first. However, some find the back tuck easier once they get used to the backward rotation because it requires less forward momentum than a front tuck.
The front tuck can feel more natural for gymnasts who are comfortable flipping forward. However, it often requires more power in the takeoff, especially if not performed with a run-up.
Progression and Skills
Both front and back tucks serve as foundations for more advanced skills. Once mastered, gymnasts can progress to:
- Layout: Performing the tuck with the body straight.
- Pike: Performing the tuck with the legs straight and the body bent at the hips.
- Multiple rotations: Adding more rotations to the tuck (e.g., double tuck, triple tuck).
- Combining with other skills: Incorporating tucks into tumbling passes or as part of routines on other apparatus.
Ultimately, mastering both front and back tucks is essential for any gymnast aiming to advance in the sport. Each skill presents unique challenges and contributes to developing a well-rounded skillset.


