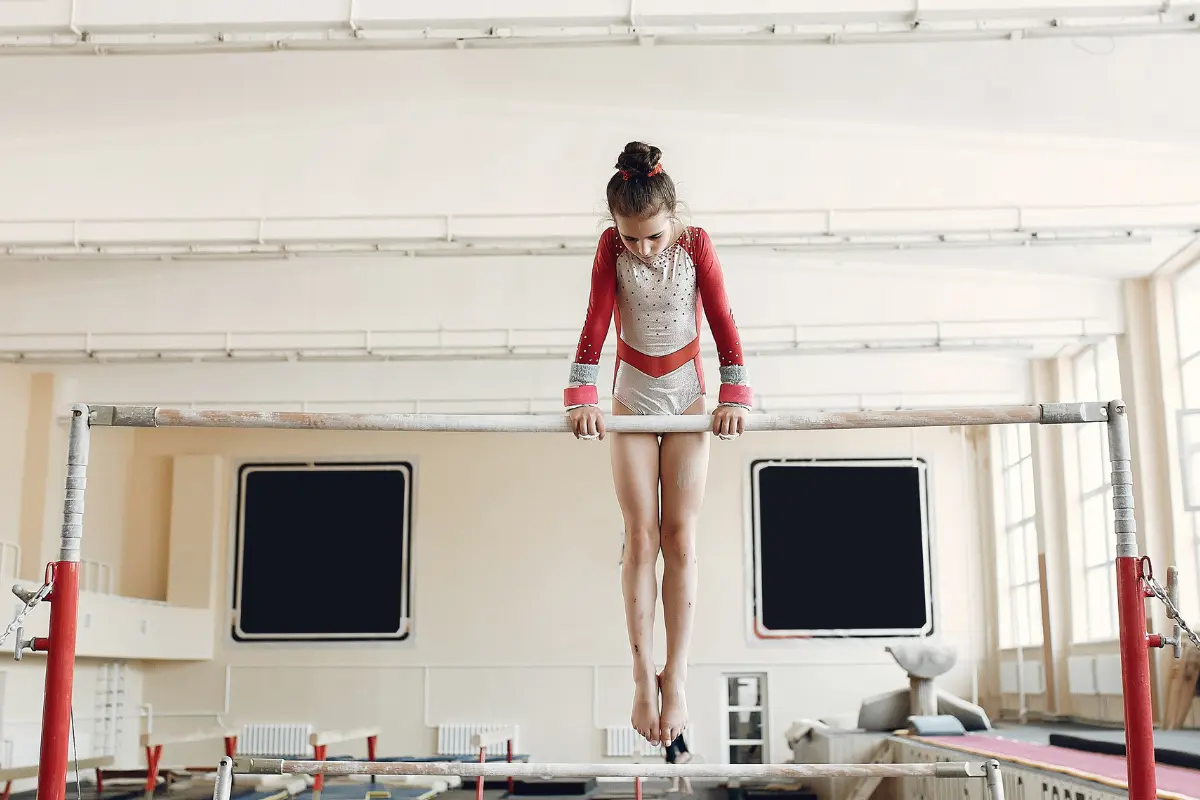
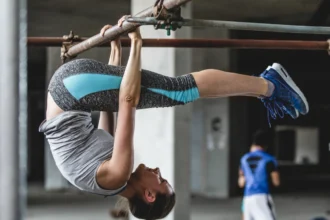
The pullover is a fundamental skill for young gymnasts learning to master the bars. It serves as a building block for many advanced bar exercises and is essential for developing upper body strength and control. In this guide, we break down the key tips and techniques you need to successfully perform a pullover on bars.
Pre-Pullover Exercises
Before attempting a pullover, it’s important to prepare your body with exercises that enhance your strength, flexibility, and control. Here are some recommended pre-pullover exercises:
- Hanging Leg Raises: Strengthen your core and improve grip strength. Hang from the bar and raise your legs until they are parallel to the ground.
- Shoulder Mobility Exercises: Improve your range of motion with exercises like arm circles, shoulder dislocations, and wall slides.
- Chin-Ups: Build upper body strength by pulling yourself up as high as possible.
Step-by-Step Breakdown of the Pullover
Step 1: Choose Your Approach
Before attempting the pullover, it’s important to decide how you’ll approach the bar. There are three common ways to begin:
1. Start Away from the Bar (Easiest)
Stand a few steps away from the bar, then take a step forward and grab it with both hands. This approach allows you to build momentum as you move toward the bar, making the pullover easier to execute.
- Why It’s Helpful: Starting away from the bar helps you build momentum and gives your body the movement needed to pull yourself up. This is great for beginners who are still learning to control their body on the bar.
2. Start Next to the Bar (Moderate Difficulty)
Position yourself next to the bar, close enough that you can step directly onto it. You’ll grip the bar and then pull yourself up without much swing.
- Why It’s Helpful: This is a step up from the first method, as it requires more strength and control to lift yourself onto the bar. However, it’s still manageable for most beginners with some practice.
3. Start Standing (Hardest)
Stand directly beneath the bar, reaching up to grip it with both hands. From this position, you’ll need to lift both feet up to reach the bar before performing the pullover.
- Why It’s Helpful: This is the most challenging approach because you’re starting from a dead stop, requiring more upper body and core strength to lift yourself. It’s the final goal for mastering the pullover and offers the most control over the movement.
This progression helps build the necessary strength and coordination to perform the pullover efficiently.
Step 2: Focus on Head and Arm Position
Proper head and arm positioning is crucial when performing a pullover on bars. This step helps maintain body alignment, ensures smooth movement, and prevents unnecessary strain or injury. Here’s how to keep your head and arms in the correct position:
1. Keep Your Head Focused
- Avoid Throwing Your Head Back: One common mistake beginners make is throwing their head back during the pullover. This can throw off your balance and disrupt the movement. Instead, keep your head neutral and focus on your feet as you pull yourself up.
- Look at Your Feet: To maintain proper alignment, keep your head down and your gaze directed toward your feet. This helps keep your body in a straight line and makes it easier to lift your hips over the bar.
Why It’s Important:
- Keeping your head in a neutral position helps maintain proper body alignment, making the movement more efficient and controlled.
- Looking at your feet helps prevent you from arching your neck too much, which can cause strain and reduce your ability to control your body during the pullover.
2. Bend Your Arms
- Keep Your Arms Bent: As you begin to pull yourself toward the bar, it’s important to keep your arms bent. Many beginners instinctively straighten their arms too early, which makes it harder to complete the pullover.
- Engage Your Arms: By keeping your arms bent, you engage your muscles, particularly in your biceps and shoulders. This will give you more control as you lift your body over the bar.
Why It’s Important:
- Bending your arms helps with better muscle engagement, ensuring that your arms can support your weight and assist in the upward movement.
- It prevents the arms from locking and reduces the risk of falling or getting stuck during the pullover.
Tip: As you approach the bar, focus on bending your elbows, keeping your arms strong but not over-extended. This will allow you to generate the power needed to complete the movement smoothly.
Step 3: Master Wrist Rotation
If you find yourself getting stuck at a certain point—especially when your body feels like it can’t make it all the way over the bar—the issue may lie in your wrists. To get your body on top of the bar, focus on rotating your wrists as you pull yourself upward.
What is Wrist Rotation?
Wrist rotation refers to the movement of your wrists as you pull yourself up. As you reach the top of the pullover, you need to rotate your wrists to help bring your body over the bar. This motion is crucial for transitioning from the pull-up phase to the over-the-bar position.
How to Perform Wrist Rotation
- Grip the Bar Firmly: Start by gripping the bar with both hands, keeping your arms bent and your body in the right position.
- Pull Up and Rotate: As you pull yourself toward the bar, initiate wrist rotation as you reach the top. Focus on rotating your wrists outward (away from your body) as your body approaches the bar.
- Finish the Movement: By rotating your wrists in this manner, you’ll be able to guide your body over the bar and complete the pullover with proper form.
Tip: You can practice wrist rotation separately from the pullover by hanging from the bar and rotating your wrists back and forth to build muscle memory. This will help you feel more comfortable when it’s time to incorporate it into the full movement.
Step 4: Use a Spotter for Assistance
A spotter can be incredibly helpful when learning the pullover, especially if you’re struggling to get your body over the bar. The spotter will assist by lifting your back and helping to push your legs over the bar, ensuring that you’re using the proper technique.
- Spotter Technique: Your spotter will lift your back as you reach the top of your pull, helping you get your legs over. This can help you understand the movement and give you the confidence to attempt it on your own.
Step 5: Build Strength
If you’re performing the pullover with proper technique but still struggling to complete it, the issue may be a lack of strength. To perform this move effectively, you need strong arms and core muscles.
Some helpful exercises include:
- Pull-Ups: This helps build arm strength, which is essential for pulling yourself over the bar.
- V-Ups: This exercise targets your core, improving the abdominal strength needed for the pullover.
Step 6: Adjust for Height if Needed
If you find that reaching the bar is difficult due to your height, there’s an easy way to make the pullover more accessible. One helpful adjustment is to use a mat to elevate your body closer to the bar. This makes it easier to reach the bar and perform the pullover, especially for shorter gymnasts.
How to Adjust for Height:
- Stand on a mat or platform that raises you closer to the bar. This reduces the distance between you and the bar, giving you a better starting position.
- The added height can make it easier to grip the bar and execute the pullover without struggling to reach it.
This adjustment is particularly useful when you are first learning the pullover or if you’re still building the strength needed to pull your body over the bar. As you progress and develop more strength and control, you can gradually work your way toward performing the pullover without the extra height assistance.
Step 7: Progress to Harder Variations
Once you’ve mastered the basic pullover, you can begin incorporating it into bar routines or drills that combine multiple bar skills. This progression will help you apply your pullover technique to more complex routines, such as back hip circles, casts, and more.
Combining multiple skills into a sequence challenges your technique, improves fluidity, and prepares you for higher-level bar routines. It also helps improve your endurance, as you will need to perform a series of skills consecutively.
Avoiding Common Mistakes
As you work on your pullover, it’s easy to fall into a few common mistakes that can prevent you from getting over the bar. Here are the key things to watch out for:
- Not Keeping Your Chin to the Bar: One of the biggest mistakes gymnasts make is dropping their chin away from the bar. When you pull up, your chin should stay glued to the bar. If your chin is too far away, you lose momentum, and you’ll struggle to complete the move.
- Not Rolling Your Hips Properly: If you’re getting your chin to the bar but still not making it over, the issue could be your hips. You need to roll your hips around the bar—not just bring them up. This movement is key to getting your body into the right position to clear the bar.
- Not Shifting Your Hands in Time: Your hands play a crucial role in helping you get over the bar. As you bring your hips around, you need to shift your hands so they end up on top of the bar. If you don’t shift your hands, the momentum will be lost, and you won’t be able to complete the pullover.
These mistakes are easy to correct once you’re aware of them, so pay attention to your technique.
Helpful Drills to Perfect Your Pullover
Now, let’s go over a few drills that will help you work towards your pullover. These exercises focus on building the strength and technique needed for a successful pullover.
- Pike Pull-Ups: Place your feet on a block, mat, or chair to help you lift your body. Your hands should be forward of your body. As you pull yourself up, make sure to bring your chin to the bar.
- Chin Holds: This one might feel tough, but it’s a great way to build the strength you need. If you can hold your chin at the bar, you’re already halfway to mastering the pullover.
- Back Rolls: While these may seem simple, back rolls help you understand how your hips should move around the bar. It’s great for developing the muscle memory needed to complete your pullover.
Final Thought
Remember to break down the movement into manageable steps and seek guidance from a coach if needed. Keep safety as your top priority by using appropriate equipment and ensuring a spotter is present for initial attempts. Embrace the journey of learning new skills, and don’t hesitate to challenge yourself with more advanced moves as you progress.
